Hey everyone!
So this week's culinary shenanigan is my attempt at another F.E.A.S.T.. Unfortunately, this one was not quite as successful as my last, but hey, experimentation is a part of this whole wacky process, right?
This week, I wanted to try something I haven't done in a while: pouch cooking. What's that, you ask? Excellent question. Essentially, it's exactly what it sounds like: cooking in a pouch. You basically wrap all your food up in a pouch of folded parchment paper or aluminum foil, throw the package in the oven (or into a bed of hot coals, though I've never tried this), and steam/bake the whole thing.
So, how do you do it, you ask? Another excellent question. Boy, you're really on top of things today, aren't you? First you pick a protein. I feel that since other meats like beef or pork really benefit from browning, and there's none of that here, fish is an excellent choice. I had some tilapia left over from my Fish and Chips meal a few weeks ago, so I went with that. Second, you pick a starch, such as rice or pasta. I went with gold potatoes, because I thought they'd be tasty. Third, you pick a few veggies to accompany your meat. I went with tomatoes, bell peppers, and mushrooms. You also select a couple of aromatics, in my case, an onion and some garlic. Finally, you choose your seasonings (salt and lemon in my case) and a flavored liquid (white wine here).
I'll have more to say afterwards, but I figure let's get down to the actual cooking first.
THE INGREDIENTS!!!
4 tilapia fillets (from a $4 frozen bag)
6 gold potatoes (about $2)
4 roma tomatoes (about $1)
1 red bell pepper (about $2)
1 yellow bell pepper (about $2)
8 baby 'bella mushrooms (from a $4 package)
1 medium yellow onion (about $1)
4 cloves of garlic (about $0.50)
salt
2 lemons ($0.25 each)
A few good splashes white wine (from a $3 bottle, but you can use fancier)
Final price: about $20, give or take.
THE METHOD!!!
Make sure your fish is well thawed in the fridge first. Once it's thawed, season it with a little salt. Set your oven for 425 degrees.
Now start chopping. Dice your potatoes. You'll want them small so that they can cook thoroughly. Seed and chop your tomatoes. Seed and chop your peppers. Clean and slice your mushrooms. Peel and slice your onion. Peel and smash your garlic cloves.
Make sure you have four large sheets of parchment paper ready to go. You want them big enough that they'll be able to fold over the food with enough left over to be folded shut.
Begin your assembly. You'll divide everything four ways, naturally. Place your potatoes down first. Lay a piece of fish on top. Squeeze half a lemon over the fish. Pile on your tomatoes, peppers, mushrooms, onions, and garlic. Last, give the whole thing a good splash (maybe 1/4 cup?) of wine. Fold the parchment over, and crease your edges together to seal the whole thing shut. (Watch out that you don't let your liquids leak away!)
Place on a cookie sheet (for ease of movement) and bake for at least 30 minutes (it took me closer to 50, actually) or until everything is done as you desire.
Ok, like I said, I wasn't terribly pleased with my results this time. Oh, everything was cooked through, so the process worked, don't get me wrong. But I had a few points of contention.
For one thing, I used too much food in each pouch. This increased the cooking time by nearly double and made the pouches difficult to seal. I actually had to double layer one of them because the first layer was too small. For another, I need to improve on my seasonings, as the whole thing tasted a bit bland. Plus, the flavors of my veggies and aromatics didn't mesh as well as I would have liked, but that could also be because the seasonings were off.
Let's review the acronym:
Fast: Sadly, no. The whole process took about 2 hours from start to eat, which is double my target time. Next time, I want to use fewer veggies (four instead of six potatoes, only one pepper, etc.) to decrease both my prep time and my cook time.
Easy: The process itself if actually pretty straightforward: chop everything up and throw together in a pouch. Cook. Done. So here, I'd say we have success.
Affordable: Here I pushed things a bit. My goal here is not to go above $20 for four people to eat, as $5/person seems pretty cheap to me. But again, next time I plan to use less food, which will also reduce the cost.
Super Tasty: Unfortunately, the best word to describe the taste here is "meh." It wasn't bad by any stretch, but it was hardly Super Tasty. It needed more seasoning, and it needed more contrasting flavors. Definitely something to work on.
So in the end, the meal itself was less than successful.
But fear not! I have not given up hope!
I plan to try this again after some careful consideration. In fact, while writing this, I came up with a fairly wacky idea that I plan to try at the earliest opportunity. But as I said, I will revisit this method, in the hopes that I can improve on the whole thing and turn it into a proper F.E.A.S.T.! So keep your eyes open for my next few posts!
Thanks again for reading everyone! Go forth and eat well!
A blog dedicated to my adventures in food and cooking.
Saturday, November 16, 2013
Monday, November 4, 2013
F.E.A.S.T.: Sloppy Joes from Scratch
Hello again everyone! I hope you're ready for another F.E.A.S.T., 'cause I've got a good one lined up.
Everybody loves Sloppy Joes, right? I mean, it's good, wholesome comfort food from our childhood. The problem is: who ever makes them from scratch? I mean, why do that when you can just as easily buy a can of Manwich, right?
Well, I say to hell with that!
Sloppy Joes are easy to make, even from scratch, and I guarantee this version will taste better than anything coming out of a can. Sure, it takes a little more effort, but trust me, it's totally worth it. Even better, it's not even pricey, and the whole thing takes about 45 minutes from start to eat. Don't believe me? Well, read on then.
THE INGREDIENTS!!!
1 to 1 1/4 lbs ground beef ($3.50)
1 medium onion, diced ($0.75)
1 red bell pepper, diced ($1.75)
2 tsp diced garlic, or 2-4 cloves (staple)
1 8oz can tomato sauce ($0.25)
1/2 cup ketchup (staple)
1/2 cup chili sauce (from a $1.50 bottle, see below!)
2 tbsp Worcestershire sauce (staple)
3 tbsp brown sugar (staple)
2 tbsp apple cider vinegar (staple)
1 tsp cumin (staple)
hot sauce, to taste (optional)
ground red pepper, to taste (optional)
salt and pepper, to taste (not optional)
Final price? $7.75
Ok, I admit, some of you may not keep some of the things I listed as "staples" on hand at all times like I do. So you can round up to $10-15 if you want. The Worcestershire sauce is probably the most expensive at about $3-4/bottle. Trust me though, it's worth it. And since all of these things will keep forever, you'll get plenty of meals out of each.
THE METHOD!!!
This couldn't be simpler. To begin, brown your beef in a skillet set over medium to med-high heat. When you can't see any more pink, drain off the fat.
Next, add your onion, garlic, and bell pepper, plus a good pinch of salt, and cook until the veggies begin to soften, about 5 minutes or so.
When that's done, add all your tomato sauce, ketchup, and chili sauce, and stir to combine. A quick aside: no, the chili sauce is not spicy. It's not Sriracha or anything like that. Essentially, it's a flavored ketchup, but it adds a nice spice-flavor to the mix. If you can't find it, just replace it with more ketchup.
Last, add the Worcestershire, sugar, vinegar, cumin, salt and pepper. If you're adding red pepper or hot sauce (woo, Frank's!), now would be the time to add that too.
Stir it all up, give it a few minutes for the flavors to meld, and voila! you're done. Serve on buns, or over rice or potatoes.
Like I said: super easy. And it all gets made in one skillet, so clean-up is a breeze too. So let's go over our acronym, shall we?
Fast: 45 minutes, from the time I stated pulling out veggies to the time I started piling food on the bun. Check.
Easy: Brown the meat. Add veggies. Add flavors. Done. Check.
Affordable: I'll give you that some of the staples may not be normal fare in everyone's kitchen, but they should be. Still, we're talking under $10 for about eight sandwiches worth of food. So I say check.
Super Tasty: Meaty. Savory. A touch of sweet. A touch of spice. The aromatic smell of fresh onion and pepper and garlic, combined with floral scent of tomatoes and earthy aroma of cumin. Trust me, your whole kitchen will smell delicious. Check.
The best part is: you can adjust the meal to suit your tastes. Don't like spices? Forget 'em! Want it a bit sweeter? Up the sugar by a tablespoon or two. Want to be adventurous? Go forth to your spice cabinet and have at it! I've seen methods calling for everything from chili powder to cloves to mustard. Besides, everyone should have their own favorite way to make Sloppy Joes. They're just that good.
Anyway, as always, thanks for reading. Go forth and eat well!
Everybody loves Sloppy Joes, right? I mean, it's good, wholesome comfort food from our childhood. The problem is: who ever makes them from scratch? I mean, why do that when you can just as easily buy a can of Manwich, right?
Well, I say to hell with that!
Sloppy Joes are easy to make, even from scratch, and I guarantee this version will taste better than anything coming out of a can. Sure, it takes a little more effort, but trust me, it's totally worth it. Even better, it's not even pricey, and the whole thing takes about 45 minutes from start to eat. Don't believe me? Well, read on then.
THE INGREDIENTS!!!
1 to 1 1/4 lbs ground beef ($3.50)
1 medium onion, diced ($0.75)
1 red bell pepper, diced ($1.75)
2 tsp diced garlic, or 2-4 cloves (staple)
1 8oz can tomato sauce ($0.25)
1/2 cup ketchup (staple)
1/2 cup chili sauce (from a $1.50 bottle, see below!)
2 tbsp Worcestershire sauce (staple)
3 tbsp brown sugar (staple)
2 tbsp apple cider vinegar (staple)
1 tsp cumin (staple)
hot sauce, to taste (optional)
ground red pepper, to taste (optional)
salt and pepper, to taste (not optional)
Final price? $7.75
Ok, I admit, some of you may not keep some of the things I listed as "staples" on hand at all times like I do. So you can round up to $10-15 if you want. The Worcestershire sauce is probably the most expensive at about $3-4/bottle. Trust me though, it's worth it. And since all of these things will keep forever, you'll get plenty of meals out of each.
THE METHOD!!!
This couldn't be simpler. To begin, brown your beef in a skillet set over medium to med-high heat. When you can't see any more pink, drain off the fat.
Next, add your onion, garlic, and bell pepper, plus a good pinch of salt, and cook until the veggies begin to soften, about 5 minutes or so.
When that's done, add all your tomato sauce, ketchup, and chili sauce, and stir to combine. A quick aside: no, the chili sauce is not spicy. It's not Sriracha or anything like that. Essentially, it's a flavored ketchup, but it adds a nice spice-flavor to the mix. If you can't find it, just replace it with more ketchup.
Last, add the Worcestershire, sugar, vinegar, cumin, salt and pepper. If you're adding red pepper or hot sauce (woo, Frank's!), now would be the time to add that too.
Stir it all up, give it a few minutes for the flavors to meld, and voila! you're done. Serve on buns, or over rice or potatoes.
Like I said: super easy. And it all gets made in one skillet, so clean-up is a breeze too. So let's go over our acronym, shall we?
Fast: 45 minutes, from the time I stated pulling out veggies to the time I started piling food on the bun. Check.
Easy: Brown the meat. Add veggies. Add flavors. Done. Check.
Affordable: I'll give you that some of the staples may not be normal fare in everyone's kitchen, but they should be. Still, we're talking under $10 for about eight sandwiches worth of food. So I say check.
Super Tasty: Meaty. Savory. A touch of sweet. A touch of spice. The aromatic smell of fresh onion and pepper and garlic, combined with floral scent of tomatoes and earthy aroma of cumin. Trust me, your whole kitchen will smell delicious. Check.
The best part is: you can adjust the meal to suit your tastes. Don't like spices? Forget 'em! Want it a bit sweeter? Up the sugar by a tablespoon or two. Want to be adventurous? Go forth to your spice cabinet and have at it! I've seen methods calling for everything from chili powder to cloves to mustard. Besides, everyone should have their own favorite way to make Sloppy Joes. They're just that good.
Anyway, as always, thanks for reading. Go forth and eat well!
Monday, October 28, 2013
Happy Holidays! Broken Glass Cupcakes
Happy Halloween everyone!
I love Halloween. Next to Christmas, it's probably my favorite holiday. I love the fun, the costumes, the creepiness, and, of course, the food. So the more ways I can find to combine a few of those things together, the better, I say. And is there a better way, here, than to make fun, creepy food? I say stoutly, that no, there is not!
BEHOLD!!
MWA HA HA HAH HAA!!
::ahem::
Sorry, but I can't resist a little maniacal cackling in the kitchen now and then. Anyway, I saw a version of these on Facebook last year, after Halloween had already come and gone. But I was so enamored with the idea that I vowed on the spot that I would make them for next Halloween. I swore that nothing would stop me from creating these creepy little gems and sharing them with my friends and family.
Naturally, a year later, I almost forgot about them.
Luckily, I remembered in time, and I was able to put them together for a Halloween party. I am quite pleased to say that they were a big hit. As such I would like to share them with you. Though not the original method I saw last year, I thought that this version was the best one to try. As usual, you are welcome to follow along with me as I plow through.
THE INGREDIENTS!!!
The Cupcakes
1 box Red Velvet cake mix
Eggs (as per the cake mix, plus 1 egg)
Milk (substituted for the water in the mix)
Melted butter (twice as much as the oil called for in the mix)
The Frosting
1 8oz package cream cheese, softened
1 1/2cup stick butter, softened
1tsp vanilla
dash of salt
4cups powdered sugar
1cup white chocolate chips
The Candy Glass
1cup sugar
1/2cup light corn syrup
1-2tsp clear flavoring (I used clear artificial vanilla)
The Edible Blood
1 14oz can sweetened condensed milk
red food coloring
black food coloring
clear flavoring, to taste (I used raspberry)
THE METHOD!!!
To begin, make the candy glass. Cover a cookie sheet with parchment or wax paper. Stir the sugar and corn syrup together in a microwave-safe bowl and cover with plastic wrap. Microwave the sugar on high for 3 minutes. Carefully! remove the plastic wrap (beware of steam!) and stir in your flavoring. Recover with fresh plastic, then microwave for another 2-3 minutes. You have to watch it; if you let it go to long, the sugar will start to turn an amber color, and that means you've gone too far. For me, it took 2minutes 15seconds, and I think I could've gotten away with a bit less.
Working carefully!, remove the plastic wrap and pour out onto your cookie sheet. Spread slightly with a spoon or spatula, then set aside to harden. This will take several hours, hence doing it first. Once it's hardened, you can take a knife tip to it to break it into sharp (no, really, they are sharp!) little shards. Just place the knife tip down on the candy and gently but firmly tap down to break it up.
Next, make the edible blood. Mix everything together.
No, really, that's it. Just play with the colors until it looks like blood. I wanted a nice dark red, but I went through an entire tube of black gel and barely got it past pale red-colored-milk red. So use your best judgement.
To make the cupcakes, follow the instructions on the box. The method calls for a few easy substitutions, which I enumerated above, all of which I recommend. Add an extra eggs. Sub out an equal amount of milk for the water. Use double the amount of melted butter as oil. (Mine called for 1/3cup oil, so I measured out 2/3 cup butter and melted it gently in the microwave). Other than that, I recommend you find some cool black and white paper cups. On mine, the red velvet cake actually turned the white paper red, which I thought looked pretty damn cool.
Last, make the frosting. Beat the cream cheese, butter, vanilla and salt together on medium speed until smooth. Incorporate the powdered sugar a cup at a time, and beat until combined. Melt the white chocolate in the microwave (go in 20-30 second increments, stirring in between. It only took me two rounds to get it smooth), and mix that in as well. If desired, but it in a piping bag (or a ziplock with the corner cut out so a piping tip can peak through) and get ready to decorate!
To create your creepily wonderful cakes, frost each cool cake as desired. I used a star tip in a ziplock bag, as I said, and went in tight spiral, getting a double layer of frosting on each cake. Next, insert a few shards of candy glass at odd or violent angles. Finally, go to town with the blood! You can put it in another bag, sure, or you can do what I did. Dip a fork in the blood, lift, and then flick the resulting drizzle across cake, frosting, and glass alike. Remember, these are supposed to be tasty and creepy, so think blood spatter and gore here. After all, you want to get into the holiday spirit, right?
These were a lot of fun to make and eat. The cake turned out nice and moist, and just dense enough to really have some good body to them. The glass turned out great, even if I did make it a smidgen too dark. The blood was also tasty, if not quite the shade of red I wanted. But the frosting... now that was the best. Lightly rich, not at all saccharine, with hints of cream cheese tang and white chocolate sweetness. It was perfect for these cakes. Like I said, they went over really well at the party, and I will definitely be making them next year!
Anyway, I hope you all enjoyed this little piece of my insanity. As always, thoughts and comments are appreciated, and thanks for reading!
I love Halloween. Next to Christmas, it's probably my favorite holiday. I love the fun, the costumes, the creepiness, and, of course, the food. So the more ways I can find to combine a few of those things together, the better, I say. And is there a better way, here, than to make fun, creepy food? I say stoutly, that no, there is not!
BEHOLD!!
MWA HA HA HAH HAA!!
::ahem::
Sorry, but I can't resist a little maniacal cackling in the kitchen now and then. Anyway, I saw a version of these on Facebook last year, after Halloween had already come and gone. But I was so enamored with the idea that I vowed on the spot that I would make them for next Halloween. I swore that nothing would stop me from creating these creepy little gems and sharing them with my friends and family.
Naturally, a year later, I almost forgot about them.
Luckily, I remembered in time, and I was able to put them together for a Halloween party. I am quite pleased to say that they were a big hit. As such I would like to share them with you. Though not the original method I saw last year, I thought that this version was the best one to try. As usual, you are welcome to follow along with me as I plow through.
THE INGREDIENTS!!!
The Cupcakes
1 box Red Velvet cake mix
Eggs (as per the cake mix, plus 1 egg)
Milk (substituted for the water in the mix)
Melted butter (twice as much as the oil called for in the mix)
The Frosting
1 8oz package cream cheese, softened
1 1/2cup stick butter, softened
1tsp vanilla
dash of salt
4cups powdered sugar
1cup white chocolate chips
The Candy Glass
1cup sugar
1/2cup light corn syrup
1-2tsp clear flavoring (I used clear artificial vanilla)
The Edible Blood
1 14oz can sweetened condensed milk
red food coloring
black food coloring
clear flavoring, to taste (I used raspberry)
THE METHOD!!!
To begin, make the candy glass. Cover a cookie sheet with parchment or wax paper. Stir the sugar and corn syrup together in a microwave-safe bowl and cover with plastic wrap. Microwave the sugar on high for 3 minutes. Carefully! remove the plastic wrap (beware of steam!) and stir in your flavoring. Recover with fresh plastic, then microwave for another 2-3 minutes. You have to watch it; if you let it go to long, the sugar will start to turn an amber color, and that means you've gone too far. For me, it took 2minutes 15seconds, and I think I could've gotten away with a bit less.
Working carefully!, remove the plastic wrap and pour out onto your cookie sheet. Spread slightly with a spoon or spatula, then set aside to harden. This will take several hours, hence doing it first. Once it's hardened, you can take a knife tip to it to break it into sharp (no, really, they are sharp!) little shards. Just place the knife tip down on the candy and gently but firmly tap down to break it up.
Next, make the edible blood. Mix everything together.
No, really, that's it. Just play with the colors until it looks like blood. I wanted a nice dark red, but I went through an entire tube of black gel and barely got it past pale red-colored-milk red. So use your best judgement.
To make the cupcakes, follow the instructions on the box. The method calls for a few easy substitutions, which I enumerated above, all of which I recommend. Add an extra eggs. Sub out an equal amount of milk for the water. Use double the amount of melted butter as oil. (Mine called for 1/3cup oil, so I measured out 2/3 cup butter and melted it gently in the microwave). Other than that, I recommend you find some cool black and white paper cups. On mine, the red velvet cake actually turned the white paper red, which I thought looked pretty damn cool.
Last, make the frosting. Beat the cream cheese, butter, vanilla and salt together on medium speed until smooth. Incorporate the powdered sugar a cup at a time, and beat until combined. Melt the white chocolate in the microwave (go in 20-30 second increments, stirring in between. It only took me two rounds to get it smooth), and mix that in as well. If desired, but it in a piping bag (or a ziplock with the corner cut out so a piping tip can peak through) and get ready to decorate!
To create your creepily wonderful cakes, frost each cool cake as desired. I used a star tip in a ziplock bag, as I said, and went in tight spiral, getting a double layer of frosting on each cake. Next, insert a few shards of candy glass at odd or violent angles. Finally, go to town with the blood! You can put it in another bag, sure, or you can do what I did. Dip a fork in the blood, lift, and then flick the resulting drizzle across cake, frosting, and glass alike. Remember, these are supposed to be tasty and creepy, so think blood spatter and gore here. After all, you want to get into the holiday spirit, right?
These were a lot of fun to make and eat. The cake turned out nice and moist, and just dense enough to really have some good body to them. The glass turned out great, even if I did make it a smidgen too dark. The blood was also tasty, if not quite the shade of red I wanted. But the frosting... now that was the best. Lightly rich, not at all saccharine, with hints of cream cheese tang and white chocolate sweetness. It was perfect for these cakes. Like I said, they went over really well at the party, and I will definitely be making them next year!
Anyway, I hope you all enjoyed this little piece of my insanity. As always, thoughts and comments are appreciated, and thanks for reading!
Monday, October 21, 2013
Deep Fried Goodness: Fish & Chips
Hey everyone!
So yeah, been a while since my last post, hasn't it? Rather than hang my head in shame, I will carry on with business as usual. I ought to get one of those "Keep Calm" shirts... "Keep calm and cook something!" I wonder if that actually exists...?
Where was I? Ah, yes. Cooking and talking about it.
Anyway, guess what? I bought a deep fryer!
Now, I know what some of you are going to say... probably some variation of, "WTF?" I expect. No matter, though. Maybe some of you will think I'm crazy for acquiring such a device, but let me offer you this counterargument: I get to fry things now.
I've wanted one for a while, so I finally decided to bite the culinary bullet and pick one up. At first, I had buyer's remorse, I admit, but then I realized how many different dishes I could create with the bloody thing, so I got over it quick enough. And for my first foray into deep frying, I decided to go with a classic: Fish and Chips.
As per usual, you can follow along with my inspiration, here.
THE INGREDIENTS!!!
4 large baking potatoes
2 cups AP flour
1 tbs baking powder
1 tsp salt
1/4 tsp cayenne pepper
a good few dashes Old Bay seasoning
~1.5 bottles Shiner Bock beer (or similar dark brown brew)
1-1.5 lbs white fish (I used frozen tilapia fillets, sliced in half)
cornstarch (for dredging)
THE METHOD!!!
To begin, cut your potatoes into vaguely french fry shaped strips by whatever method you choose. I just took my chef's knife and cut them in half lengthwise. Then I cut each half in half again, and cut each quarter into about four strips. Once you have your taters cut to size, soak them in cold water for at least 15 minutes to remove excess starch. When they're done soaking, they'll need to be dried as thoroughly as possible, either with towels or a salad spinner.
Meanwhile, make your batter. Combine the flour, baking powder, salt, pepper, and Old Bay together in a bowl. Then add the beer. I started with one bottle of beer and found it wasn't enough, so I added more until it got a nice gooey-batter consistency. Imagine the consistency of cake batter, and you have it right. Once this is made, give it about a 10 minute rest in the fridge, just so that the flour can absorb all that delicious beer.
Ok, now begins the frying. Get your oil to about 325 degrees and your oven to about 200 degrees. All will be made clear. Working in batches, fry the potatoes for about 2-3 minutes or until pale and floppy. Remove from the oil, drain on paper towels, and set aside to cool to room temp. This is only the first frying; the second time in will get them crispy and GBD.
Raise the oil temp to 350 and get your fish ready. Dredge each piece lightly in cornstarch, being sure to remove any excess powder. Then, submerge the fish in your batter, coating evenly. Gently introduce the fish into the oil; don't just drop them in or they'll sink to the bottom of the pot and stick. Once the batter sets, flip them over with a metal instrument of your choice (I used a spatula, but you can use tongs, a fork, a flute, whatever's handy), and cook until GBD. This'll take about 2-3 minutes. Once they're done, drain them and set them on a pan in your warm oven while you finish the fries.
Raise the oil temp again, this time to 375. Working in batches again, fry your potatoes for 2-3 minutes or until GBD. Remove from the oil, drain, salt, and consume. Oh yeah, and get the fish outta the oven too. I like my fried fish with malt vinegar, personally.
THE AFTERMATH!!!
Ok, so this was a fairly simple method. But simple does not equate to easy, now does it? The challenge here was learning patience, and understanding that I couldn't do everything all at once. Next time, I need to use smaller potato slices (like cutting the ones I had in half) and work in smaller batches so that the fries crisp up a little better.
But, in the end, everything turned out pretty good. The outside of the fish was very crisp and savory, and the fish itself was perfectly cooked without being dry. I would perhaps consider using different fish the next time though, since I thought the tilapia was slightly too soft.
But perhaps I'm being overly critical of myself.
I know; me. Shocking, isn't it?
Anywho, thanks as always for reading! I hope you enjoyed reading about it as much as I enjoyed making it.
So yeah, been a while since my last post, hasn't it? Rather than hang my head in shame, I will carry on with business as usual. I ought to get one of those "Keep Calm" shirts... "Keep calm and cook something!" I wonder if that actually exists...?
Where was I? Ah, yes. Cooking and talking about it.
Anyway, guess what? I bought a deep fryer!
Now, I know what some of you are going to say... probably some variation of, "WTF?" I expect. No matter, though. Maybe some of you will think I'm crazy for acquiring such a device, but let me offer you this counterargument: I get to fry things now.
I've wanted one for a while, so I finally decided to bite the culinary bullet and pick one up. At first, I had buyer's remorse, I admit, but then I realized how many different dishes I could create with the bloody thing, so I got over it quick enough. And for my first foray into deep frying, I decided to go with a classic: Fish and Chips.
As per usual, you can follow along with my inspiration, here.
THE INGREDIENTS!!!
4 large baking potatoes
2 cups AP flour
1 tbs baking powder
1 tsp salt
1/4 tsp cayenne pepper
a good few dashes Old Bay seasoning
~1.5 bottles Shiner Bock beer (or similar dark brown brew)
1-1.5 lbs white fish (I used frozen tilapia fillets, sliced in half)
cornstarch (for dredging)
THE METHOD!!!
To begin, cut your potatoes into vaguely french fry shaped strips by whatever method you choose. I just took my chef's knife and cut them in half lengthwise. Then I cut each half in half again, and cut each quarter into about four strips. Once you have your taters cut to size, soak them in cold water for at least 15 minutes to remove excess starch. When they're done soaking, they'll need to be dried as thoroughly as possible, either with towels or a salad spinner.
Meanwhile, make your batter. Combine the flour, baking powder, salt, pepper, and Old Bay together in a bowl. Then add the beer. I started with one bottle of beer and found it wasn't enough, so I added more until it got a nice gooey-batter consistency. Imagine the consistency of cake batter, and you have it right. Once this is made, give it about a 10 minute rest in the fridge, just so that the flour can absorb all that delicious beer.
Ok, now begins the frying. Get your oil to about 325 degrees and your oven to about 200 degrees. All will be made clear. Working in batches, fry the potatoes for about 2-3 minutes or until pale and floppy. Remove from the oil, drain on paper towels, and set aside to cool to room temp. This is only the first frying; the second time in will get them crispy and GBD.
Raise the oil temp to 350 and get your fish ready. Dredge each piece lightly in cornstarch, being sure to remove any excess powder. Then, submerge the fish in your batter, coating evenly. Gently introduce the fish into the oil; don't just drop them in or they'll sink to the bottom of the pot and stick. Once the batter sets, flip them over with a metal instrument of your choice (I used a spatula, but you can use tongs, a fork, a flute, whatever's handy), and cook until GBD. This'll take about 2-3 minutes. Once they're done, drain them and set them on a pan in your warm oven while you finish the fries.
Raise the oil temp again, this time to 375. Working in batches again, fry your potatoes for 2-3 minutes or until GBD. Remove from the oil, drain, salt, and consume. Oh yeah, and get the fish outta the oven too. I like my fried fish with malt vinegar, personally.
THE AFTERMATH!!!
Ok, so this was a fairly simple method. But simple does not equate to easy, now does it? The challenge here was learning patience, and understanding that I couldn't do everything all at once. Next time, I need to use smaller potato slices (like cutting the ones I had in half) and work in smaller batches so that the fries crisp up a little better.
But, in the end, everything turned out pretty good. The outside of the fish was very crisp and savory, and the fish itself was perfectly cooked without being dry. I would perhaps consider using different fish the next time though, since I thought the tilapia was slightly too soft.
But perhaps I'm being overly critical of myself.
I know; me. Shocking, isn't it?
Anywho, thanks as always for reading! I hope you enjoyed reading about it as much as I enjoyed making it.
Tuesday, September 24, 2013
F.E.A.S.T.: Chicken Gyros
The last time I posted a meal like this, I called it a Q.E.C.T., which while technically an acronym, has absolutely no panache whatsoever. So, this time I have a shiny new acronym: F.E.A.S.T.! It stands for Fast, Easy, Affordable, and Super Tasty!
I love it.
It explains exactly what I was going for, and it actually spells out a culinarily-related word. It's also got a touch of irony, which appeals to my literary side. And yes, I know "culinarily" isn't really a word, but if an English Major can't make up words, well, who can? I mean, if Shakespeare could do it, why not me? Right?
But I digress.
So I love gyros. They're great sandwiches, loaded with lots of savory, meaty flavor. They remind me of the week I spent in Greece back in college. Unfortunately, since I don't have a vertical rotisserie (aka the rotating meat rack of goodness) like the kind found in Greek restaurants, it's kind of hard to replicate the experience. AB has a method using a normal rotisserie, but alas, I am lacking in one of those too. So, what did I do? I improvised.
Basically, I substituted chicken for the lamb traditionally used. I also sauteed up the accompaniments, just to help meld the flavors. I think it turned out really well too.
THE INGREDIENTS!!! (and prices, rounded to the nearest $0.25 for convenience)
1 17.6oz tub plain Greek yogurt ($3.25)
1 cucumber, peeled and seeded ($0.75)
4tsp (or cloves) chopped garlic (stock item)
1 good pinch kosher salt (stock item)
4tsp olive oil (stock item)
3tsp red wine vinegar (stock item)
A few good shakes of dried mint (or 5-6 fresh leaves if you have it)
4 boneless, skinless chicken breasts (from a $6.50 frozen package)
3 roma tomatoes, seeded ($0.75)
1 medium white onion ($0.75)
1 6oz can pitted black olives ($1.00)
1 5oz package crumbled feta cheese ($2.00)
lemon juice (from a $0.50 lemon or a bottle)
Pita bread ($2.75)
FINAL PRICE: $17.75 to serve 4 people
THE METHOD!!!
First, make the tzatziki sauce. I'm basing this off the AB method, found here.
Drop your peeled and seeded cucumber into a food processor and pulse a few times to finely chop. Then, drop the cucumber into a tea towel and squeeze the heck out of it to remove any excess liquid.
Combine the Greek yogurt, cucumber, garlic, salt, olive oil, vinegar and mint together in a bowl. Chill and serve. This whole process took about 15 minutes, so I'd say it qualifies as fast, no?
Next, the chicken. Cut the meat into bite-sized pieces. Saute the chicken with a little olive oil, salt and pepper over medium to med-high heat until done.
Meanwhile, slice your onion to your desired size and shape. I prefer half-moons for this, but whatever works for you is fine. Make like with the chicken, and saute with a little olive oil and salt over medium to med-high heat for about 5 to 10 minutes, or until the onions begin to take on a light golden color.
Drop your seeded tomatoes and olives into your food processor and pulse a few times to chop. When the onions are ready, add the tomatoes and olives and heat for a minute or two or until the tomaotes begin to release their juices. Add your lemon juice and the feta cheese, and heat through until the cheese begins to melt. It won't take but another minute.
Serve on pita bread, hot-dog style.
Like I said, it took about 15 minutes to whip up the tzatziki, and then it took another 30-35 minutes for everything else. And as with last time, I started the timer when I first started pulling out ingredients, so that includes chopping and mixing and what-not. So, under an hour for a good hot meal made with fresh ingredients.
The results? Delicious. The cooked onions, tomatoes, and olives worked quite nicely with the chicken, and the salty sweet feta cheese complimented the whole thing perfectly inside the pita bread. Moreover, the fresh tzatziki really brings the whole thing together to make for a great flavor. Is it a real gyro? No, not really. But it still make for a damn good sandwich in my humble opinion.
So. Let's do our acronym check.
Fast: the whole process from start to finish took less than an hour, so I'd say that qualifies. If you want to get any faster, you'd have to turn to your microwave.
Easy: nothing fancy here. All you need are some basic cooking skills and the ability to properly squeeze a cucumber into oblivion.
Affordable: ok, I'm willing to concede a little bit here, since I have so many "stock" items on the list, and some people may not keep those things on hand as a matter of course. But! Once those things have been acquired, it's a simple and wallet-friendly matter to purchase the last few items.
Super Tasty: Yes. Enough said.
But don't take my word for it. Make up a batch to try for yourself!
As always, thanks for reading!
I love it.
It explains exactly what I was going for, and it actually spells out a culinarily-related word. It's also got a touch of irony, which appeals to my literary side. And yes, I know "culinarily" isn't really a word, but if an English Major can't make up words, well, who can? I mean, if Shakespeare could do it, why not me? Right?
But I digress.
So I love gyros. They're great sandwiches, loaded with lots of savory, meaty flavor. They remind me of the week I spent in Greece back in college. Unfortunately, since I don't have a vertical rotisserie (aka the rotating meat rack of goodness) like the kind found in Greek restaurants, it's kind of hard to replicate the experience. AB has a method using a normal rotisserie, but alas, I am lacking in one of those too. So, what did I do? I improvised.
Basically, I substituted chicken for the lamb traditionally used. I also sauteed up the accompaniments, just to help meld the flavors. I think it turned out really well too.
THE INGREDIENTS!!! (and prices, rounded to the nearest $0.25 for convenience)
1 17.6oz tub plain Greek yogurt ($3.25)
1 cucumber, peeled and seeded ($0.75)
4tsp (or cloves) chopped garlic (stock item)
1 good pinch kosher salt (stock item)
4tsp olive oil (stock item)
3tsp red wine vinegar (stock item)
A few good shakes of dried mint (or 5-6 fresh leaves if you have it)
4 boneless, skinless chicken breasts (from a $6.50 frozen package)
3 roma tomatoes, seeded ($0.75)
1 medium white onion ($0.75)
1 6oz can pitted black olives ($1.00)
1 5oz package crumbled feta cheese ($2.00)
lemon juice (from a $0.50 lemon or a bottle)
Pita bread ($2.75)
FINAL PRICE: $17.75 to serve 4 people
THE METHOD!!!
First, make the tzatziki sauce. I'm basing this off the AB method, found here.
Drop your peeled and seeded cucumber into a food processor and pulse a few times to finely chop. Then, drop the cucumber into a tea towel and squeeze the heck out of it to remove any excess liquid.
Combine the Greek yogurt, cucumber, garlic, salt, olive oil, vinegar and mint together in a bowl. Chill and serve. This whole process took about 15 minutes, so I'd say it qualifies as fast, no?
Next, the chicken. Cut the meat into bite-sized pieces. Saute the chicken with a little olive oil, salt and pepper over medium to med-high heat until done.
Meanwhile, slice your onion to your desired size and shape. I prefer half-moons for this, but whatever works for you is fine. Make like with the chicken, and saute with a little olive oil and salt over medium to med-high heat for about 5 to 10 minutes, or until the onions begin to take on a light golden color.
Drop your seeded tomatoes and olives into your food processor and pulse a few times to chop. When the onions are ready, add the tomatoes and olives and heat for a minute or two or until the tomaotes begin to release their juices. Add your lemon juice and the feta cheese, and heat through until the cheese begins to melt. It won't take but another minute.
Serve on pita bread, hot-dog style.
Like I said, it took about 15 minutes to whip up the tzatziki, and then it took another 30-35 minutes for everything else. And as with last time, I started the timer when I first started pulling out ingredients, so that includes chopping and mixing and what-not. So, under an hour for a good hot meal made with fresh ingredients.
The results? Delicious. The cooked onions, tomatoes, and olives worked quite nicely with the chicken, and the salty sweet feta cheese complimented the whole thing perfectly inside the pita bread. Moreover, the fresh tzatziki really brings the whole thing together to make for a great flavor. Is it a real gyro? No, not really. But it still make for a damn good sandwich in my humble opinion.
So. Let's do our acronym check.
Fast: the whole process from start to finish took less than an hour, so I'd say that qualifies. If you want to get any faster, you'd have to turn to your microwave.
Easy: nothing fancy here. All you need are some basic cooking skills and the ability to properly squeeze a cucumber into oblivion.
Affordable: ok, I'm willing to concede a little bit here, since I have so many "stock" items on the list, and some people may not keep those things on hand as a matter of course. But! Once those things have been acquired, it's a simple and wallet-friendly matter to purchase the last few items.
Super Tasty: Yes. Enough said.
But don't take my word for it. Make up a batch to try for yourself!
As always, thanks for reading!
Friday, September 20, 2013
Beer and Bacon Pancakes
Y'know what I've always thought was a great idea? Breakfast for dinner. I tend to make it on a fairly regular basis, but I don't always experiment. Well, that's changing.
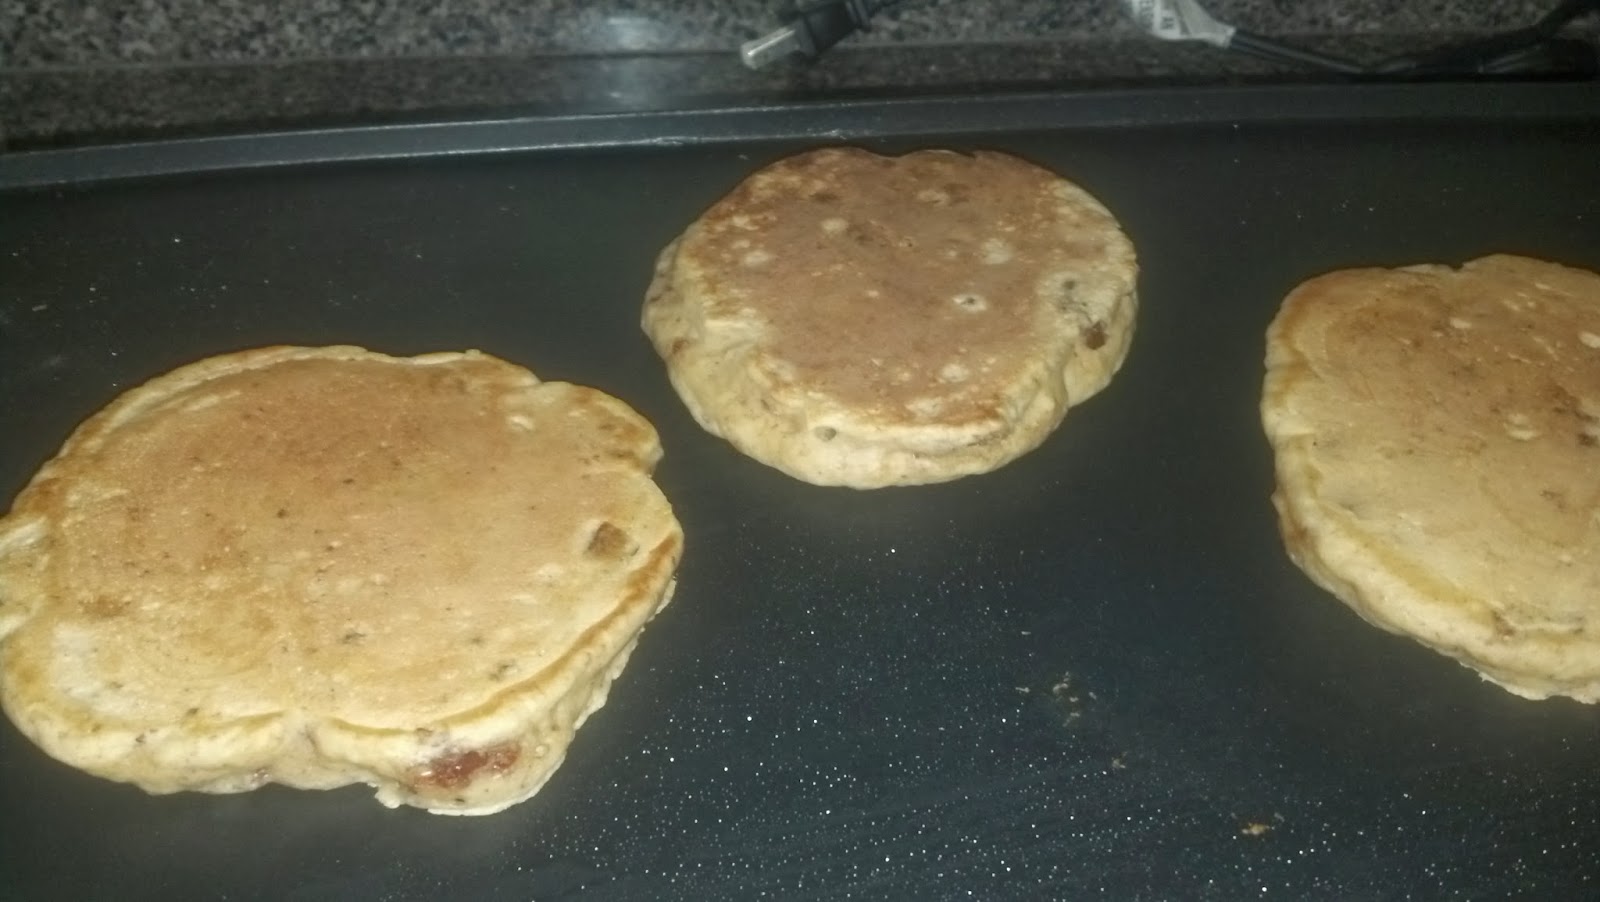
So. Pancakes. Made with beer. And bacon. Crazy huh? My roommate suggested the idea of pancakes made with beer, and a quick Google search led me here of all places. Rather than following this method exactly, I decided to simply use it as a guide and improvise a little. I adapted a basic pancake recipe to my needs, and these are the results:
Not bad, huh? Truth to tell though, the results weren't quite what I hoped they would be. Don't get me wrong, they were tasty enough, but I think the idea needs some tweaking. For one thing, the "beer" flavor overwhelmed the others, so we lost the delicious savory bacon taste except in small bursts. And although I used a seasonal beer (Shock Top pumpkin wheat), a lot of the warm autumn flavors fell to the background too.
Next time, I think I'll use a lighter flavored beer, like maybe a blond or a hefeweizen. The other option, if I want to stick with the pumpkin ale, would be to add more spices, such as cinnamon, nutmeg and clove. I love the praline bacon (yes, you heard me), and I think it works well in the recipe. But next time I plan to use think-cut bacon instead of the thin stuff; I think it'll hold up better in the batter.
Well, I suppose I should actually get to the method now, shouldn't I? As always, if anyone has an suggestions or comments, I'm always glad to hear them.
THE INGREDIENTS!!!
2 cups AP flour
5 tsp baking powder
2 eggs, lightly beaten
1 12oz beer (something of quality, please)
1 12oz package bacon
2.5 oz brown sugar
1.5 oz pecans
THE METHOD!!!
The first step is to make Praline Bacon. It's pretty easy to do, actually. First, heat your oven to 400 degrees. Grab a cookie sheet with a lip and line it with a big piece of aluminum foil. Set a cooling rack on top and lay out the bacon in a nice neat row. Bake until almost, but not quite, done. The thin stuff took less than 10 minutes, but the AB method calls for a full 30 on the thick-cut strips.
While the bacon bakes, drop the pecans and brown sugar into a food processor and chop to a fine bread crumb consistency. When the bacon is almost done, pull it out. Working carefully, sprinkle the bacon with the brown sugar/pecan mixture and gently pat down to set it.
Place the bacon back into the oven for another 10 minutes or until done. And make sure to watch it; I didn't keep a close enough eye on it and ended up burning it a little.
Oh, don't look at me like that. I know it's a culinary sin and I'll go to confession later.
Anyway. When the bacon is (properly) done, let it cool for a few minutes before removing from the rack and chopping into bite-sized pieces. Again, work carefully so as not to burn yourself.
Meanwhile, combine the flour and baking powder in a large mixing bowl. Add the eggs, beer, and bacon, and stir to combine.
Heat your electric griddle to medium, about 300 to 325. Drop the batter in 1/4 cup increments onto the hot griddle, and cook for 2-3 minutes per side, or until done. Serve with (real!) maple syrup.
See, it's a pretty straightforward method. It just needs some fine-tuning.
Anyway, as always, thanks for reading!
So. Pancakes. Made with beer. And bacon. Crazy huh? My roommate suggested the idea of pancakes made with beer, and a quick Google search led me here of all places. Rather than following this method exactly, I decided to simply use it as a guide and improvise a little. I adapted a basic pancake recipe to my needs, and these are the results:
Not bad, huh? Truth to tell though, the results weren't quite what I hoped they would be. Don't get me wrong, they were tasty enough, but I think the idea needs some tweaking. For one thing, the "beer" flavor overwhelmed the others, so we lost the delicious savory bacon taste except in small bursts. And although I used a seasonal beer (Shock Top pumpkin wheat), a lot of the warm autumn flavors fell to the background too.
Next time, I think I'll use a lighter flavored beer, like maybe a blond or a hefeweizen. The other option, if I want to stick with the pumpkin ale, would be to add more spices, such as cinnamon, nutmeg and clove. I love the praline bacon (yes, you heard me), and I think it works well in the recipe. But next time I plan to use think-cut bacon instead of the thin stuff; I think it'll hold up better in the batter.
Well, I suppose I should actually get to the method now, shouldn't I? As always, if anyone has an suggestions or comments, I'm always glad to hear them.
THE INGREDIENTS!!!
2 cups AP flour
5 tsp baking powder
2 eggs, lightly beaten
1 12oz beer (something of quality, please)
1 12oz package bacon
2.5 oz brown sugar
1.5 oz pecans
THE METHOD!!!
The first step is to make Praline Bacon. It's pretty easy to do, actually. First, heat your oven to 400 degrees. Grab a cookie sheet with a lip and line it with a big piece of aluminum foil. Set a cooling rack on top and lay out the bacon in a nice neat row. Bake until almost, but not quite, done. The thin stuff took less than 10 minutes, but the AB method calls for a full 30 on the thick-cut strips.
While the bacon bakes, drop the pecans and brown sugar into a food processor and chop to a fine bread crumb consistency. When the bacon is almost done, pull it out. Working carefully, sprinkle the bacon with the brown sugar/pecan mixture and gently pat down to set it.
Place the bacon back into the oven for another 10 minutes or until done. And make sure to watch it; I didn't keep a close enough eye on it and ended up burning it a little.
Oh, don't look at me like that. I know it's a culinary sin and I'll go to confession later.
Anyway. When the bacon is (properly) done, let it cool for a few minutes before removing from the rack and chopping into bite-sized pieces. Again, work carefully so as not to burn yourself.
Meanwhile, combine the flour and baking powder in a large mixing bowl. Add the eggs, beer, and bacon, and stir to combine.
Heat your electric griddle to medium, about 300 to 325. Drop the batter in 1/4 cup increments onto the hot griddle, and cook for 2-3 minutes per side, or until done. Serve with (real!) maple syrup.
See, it's a pretty straightforward method. It just needs some fine-tuning.
Anyway, as always, thanks for reading!
Sunday, September 8, 2013
Food in Canada
Hi again!
After my brief trek to Indy for the gaming convention, I went to visit some family that lives all the way up in Canada. Again, I didn't really have an opportunity to do much cooking, but we did eat at a few cool places, and I felt like sharing them with you. So, without further ado:
Big Rig Brewery
The place: Your basic bar and grill, except for the fact that they do serve only the beer they brew themselves. The place has a kind of dark and modern brewery sort of look, which is totally a thing, I promise. As you might expect from a restaurant like this, you can purchase overpriced merchandise of all sorts in addition to your meal.
What I ate: I chose the Parmesan Crusted Chicken & Gouda Sandwich. It's exactly what it sounds like: a piece of grilled chicken encrusted in Parmesan cheese, with avocado, romaine lettuce, tomatoes, and Sriracha mayo served on Swiss panini bread. It also came with hand-cut fries and a vinegary coleslaw, both of which were quite tasty. I also tried their Big Rig Rideau Red beer, which I also enjoyed.
My thoughts: I'm having a hard time coalescing my thoughts on Big Rig, truth to tell. The food was good, and the beer was delicious, but nothing about the place really stands out for me. I guess I was distracted by all the family I was with. It just means I need to go back and try it again next year to get another gauge of the place. For now, I'll give it a 3.5 out of 5 stars.
Lanark Pizzeria
The place: Unfortunately, this was delivery, so I can't really say anything about the location itself. I can say, however, that it's a local pizzeria, named for the county in which it resides.
What I ate: We ordered a basic pepperoni pizza and the Lanark Special, consisting of ham, pepperoni, sausage, mushrooms and green peppers. The cool thing is that up there, the pizzerias put all the cheese on top, so it gets extra brown and crispy in the oven. It also seals in all the flavors from the other toppings, steaming them after a fashion. The flavor of it is great.
My thoughts: A local pizzeria as good as any you could hope to find. 4 out of 5 stars.
Harvey's
The place: Ok, so this is basically a fast-food Canadian burger chain, kinda like Burger King. As such, there isn't much to describe here. I mean, it's a burger joint, right? But it's a pretty nifty place nonetheless. They make your burger to order, and then they have a station laid out to add what toppings you want right in front of you. That way, you can customize your burger to your exact taste. Unfortunately, what they have is pretty basic, except for the salad peppers, so the option for a bacon-mushroom-swiss is out of the picture.
What I ate: I opted for the number 2 combo, a Harvey's burger with cheese, topped with lettuce and tomatoes, mayo and ketchup. I also had poutine. What's poutine, you ask? That's when they take your french fries and top them with brown gravy (poutine sauce) and white cheese curds. Yes, it sounds like some crazy Canadian concoction, I know, but trust me, it's actually pretty good. Seriously, don't knock it if you've never had it.
My thoughts: Like I said, it's good ol' fast-food burgers and fries. But, we make sure to eat there every time we go to visit the relatives, so that should tell you something. I give it 3.5 out of 5 stars on the (fast) food scale.
Wheeler's Pancake House
The place: Wheeler's is set back in an actual sugar camp, where they drain the sap from maple trees and distill it down into the magical amber brew known as maple syrup. Can you tell I'm a fan of the stuff? In addition to that, the premises hosts a small museum showcasing paraphernalia from the history of the maple industry. The restaurant itself is a big log cabin style hall, decorated with tools of the maple trade and family photos on the walls and fireplace mantle. It is a family business, after all, and the focus is definitely on the food.
What I ate: I ordered the Sugar Bush Special, consisting of two pancakes and three homemade maple sausages, and a side of maple baked beans. Like I said, the focus is on the food, especially the maple syrup, which comes in plentiful amounts. The food is simple, delicious, and thoroughly infused with Canadian maple goodness.
My thoughts: I love this place. Like Harvey's, we're sure to go there every year, but I always look forward to Wheeler's the most. I'm also sure to stock up on maple syrup and maple candy (as in addiction-inducing solid maple sugar) whenever I visit. 4.5/5, easy.
I'm still trying to get a handle on this whole food review thing. I think the pictures definitely help, but I need to take better notes so that I can describe things in better detail. I mean, I have a pretty easy time talking about food that I've made myself, but this is a bit more of a challenge somehow. I promise though that when I start reviewing restaurants in earnest, I'll be able to provide a much more thorough analysis.
As always, thoughts and opinions are appreciated! Thanks for reading!
After my brief trek to Indy for the gaming convention, I went to visit some family that lives all the way up in Canada. Again, I didn't really have an opportunity to do much cooking, but we did eat at a few cool places, and I felt like sharing them with you. So, without further ado:
Big Rig Brewery
The place: Your basic bar and grill, except for the fact that they do serve only the beer they brew themselves. The place has a kind of dark and modern brewery sort of look, which is totally a thing, I promise. As you might expect from a restaurant like this, you can purchase overpriced merchandise of all sorts in addition to your meal.
What I ate: I chose the Parmesan Crusted Chicken & Gouda Sandwich. It's exactly what it sounds like: a piece of grilled chicken encrusted in Parmesan cheese, with avocado, romaine lettuce, tomatoes, and Sriracha mayo served on Swiss panini bread. It also came with hand-cut fries and a vinegary coleslaw, both of which were quite tasty. I also tried their Big Rig Rideau Red beer, which I also enjoyed.
My thoughts: I'm having a hard time coalescing my thoughts on Big Rig, truth to tell. The food was good, and the beer was delicious, but nothing about the place really stands out for me. I guess I was distracted by all the family I was with. It just means I need to go back and try it again next year to get another gauge of the place. For now, I'll give it a 3.5 out of 5 stars.
Lanark Pizzeria
The place: Unfortunately, this was delivery, so I can't really say anything about the location itself. I can say, however, that it's a local pizzeria, named for the county in which it resides.
What I ate: We ordered a basic pepperoni pizza and the Lanark Special, consisting of ham, pepperoni, sausage, mushrooms and green peppers. The cool thing is that up there, the pizzerias put all the cheese on top, so it gets extra brown and crispy in the oven. It also seals in all the flavors from the other toppings, steaming them after a fashion. The flavor of it is great.
My thoughts: A local pizzeria as good as any you could hope to find. 4 out of 5 stars.
Harvey's
The place: Ok, so this is basically a fast-food Canadian burger chain, kinda like Burger King. As such, there isn't much to describe here. I mean, it's a burger joint, right? But it's a pretty nifty place nonetheless. They make your burger to order, and then they have a station laid out to add what toppings you want right in front of you. That way, you can customize your burger to your exact taste. Unfortunately, what they have is pretty basic, except for the salad peppers, so the option for a bacon-mushroom-swiss is out of the picture.
What I ate: I opted for the number 2 combo, a Harvey's burger with cheese, topped with lettuce and tomatoes, mayo and ketchup. I also had poutine. What's poutine, you ask? That's when they take your french fries and top them with brown gravy (poutine sauce) and white cheese curds. Yes, it sounds like some crazy Canadian concoction, I know, but trust me, it's actually pretty good. Seriously, don't knock it if you've never had it.
My thoughts: Like I said, it's good ol' fast-food burgers and fries. But, we make sure to eat there every time we go to visit the relatives, so that should tell you something. I give it 3.5 out of 5 stars on the (fast) food scale.
Wheeler's Pancake House
The place: Wheeler's is set back in an actual sugar camp, where they drain the sap from maple trees and distill it down into the magical amber brew known as maple syrup. Can you tell I'm a fan of the stuff? In addition to that, the premises hosts a small museum showcasing paraphernalia from the history of the maple industry. The restaurant itself is a big log cabin style hall, decorated with tools of the maple trade and family photos on the walls and fireplace mantle. It is a family business, after all, and the focus is definitely on the food.
What I ate: I ordered the Sugar Bush Special, consisting of two pancakes and three homemade maple sausages, and a side of maple baked beans. Like I said, the focus is on the food, especially the maple syrup, which comes in plentiful amounts. The food is simple, delicious, and thoroughly infused with Canadian maple goodness.
My thoughts: I love this place. Like Harvey's, we're sure to go there every year, but I always look forward to Wheeler's the most. I'm also sure to stock up on maple syrup and maple candy (as in addiction-inducing solid maple sugar) whenever I visit. 4.5/5, easy.
I'm still trying to get a handle on this whole food review thing. I think the pictures definitely help, but I need to take better notes so that I can describe things in better detail. I mean, I have a pretty easy time talking about food that I've made myself, but this is a bit more of a challenge somehow. I promise though that when I start reviewing restaurants in earnest, I'll be able to provide a much more thorough analysis.
As always, thoughts and opinions are appreciated! Thanks for reading!
Subscribe to:
Posts (Atom)


