Showing posts with label bacon!. Show all posts

Monday, November 24, 2014

F.E.A.S.T.: Clam Chowder

Wait a minute, didn't I just post something yesterday? I seem to recall doing something with lots of pumpkin....

Eh, what're you gonna do?

Hello again, dear readers!

In honor of the recent snap of cold weather we had a short time back (when everything decided to get down below freezing before jumping back up to the 70s), I decided that it was the perfect time to try my hand at making some soup. OK, so my roommate requested it, but who's keeping track?

So I made it my mission to make New England style (or close enough) clam chowder, from scratch, as a F.E.A.S.T.! I got everything together, I worked my tail off, and I made a pretty delicious bowl of soup, thank you very much. Then I looked at my budget. And then I looked at the clock.

::sigh::

Yeah. So, not a F.E.A.S.T., or at least, not really. I went over on both time and funds, which are two of the four pillars that hold up this whole wacky concept. So to say that this one is teetering would be an understatement. However! The soup was a success, and I think that with a bit of stretching, we can make this work, even if we have to bend the rules a bit. Regardless, I think this one is worth sharing, so I'm going to do just that!

WHAT I USED!!!
2 small yellow onions, diced ($1.0)
10-12 yellow potatoes, cubed (from a $1.5 bag)
4 cans baby clams, water reserved ($8.0)
32oz veggie stock ($2.0)
1pint heavy cream ($2.0)
1/2 package of bacon!, diced (from a $3.5 package)
a few sprigs of fresh thyme ($2.0)
3-5tbs AP flour (stock)
a few bay leaves (stock)

Final Price: $20

Huh, OK, so now that I've written it out, maybe I didn't go as over on the budget as I'd thought. I must be remembering something else. And it does make a lot of chowder, so I don't feel too bad about being on the borderline.

WHAT I DID!!!
In a large stockpot, cook the bacon over medium heat until almost crispy, then toss in the onions. Throw a bit of salt on top of them for good measure. Give the onions about 5-7min to soften. When the onions are cooked, but before they start to take on too much color, sprinkle on your flour. You want enough to absorb all the bacon drippings and form a roux. This will help to thicken the soup. It's hard to describe, but suffice to say, when it looks like a thin paste with no flour lumps, you should be set.

Once you have your roux, add the veggie stock and stir to combine with all the flour. Once it's smooth, add the water from the clams, the cream, and the potatoes. You can toss the bay leaves (which will have to come out at the end) and the thyme in as well, or you can put them in a large tea ball and let them steep that way. Bring the mixture just to a boil, then lower the heat and simmer for about 15-20min., or until the potatoes are fork-tender.

Toss the clams in, and sprinkle a healthy amount of freshly-ground black pepper over the whole thing. Give it another five minutes for the clams to firm up, and you're ready to serve with (or in!) the bread of your choice!


Alright then, let's get right to our acronym. I, for one, am anxious to see how this all pans out!

Fast: Not really. The whole thing, starting with chopping the veggies, took about an hour and twenty minutes. So no luck there. But what am I saying? Get some help and make it go faster! (Just be careful out there with all the sharp knives, OK?)

Easy: Yeah, it's basically adding a bunch of stuff to a pot and letting it go. That's why I love soup; it really is just that easy!

Affordable: Twenty bucks for about 8 servings seems pretty awesome to me. Woo-hoo! We made this pillar work after all!

Super Tasty: Oh very yes. The clams, so plump and juicy, with just a hint of the sea, were definitely the main attraction. But the seasonings and the potatoes added their own unique flavors as well, providing a perfect balance. It was creamy and hardy without being too thick, like canned chowders so often are. I call it good ol' fashioned comfort food, the kind that fills you up and warms you through. And the bacon, of course, makes everything better.

So there you have it: a savory bowl of clam chowder, prepped in just over an hour with a conscious nod towards a healthy budget. I hope you enjoyed this entry, and I hope that you will give this soup a try and tell me what you think. I more or less crafted it myself, taking elements and inspiration from about three or five different methods I found around the internets, so I am very interested to hear what people think.
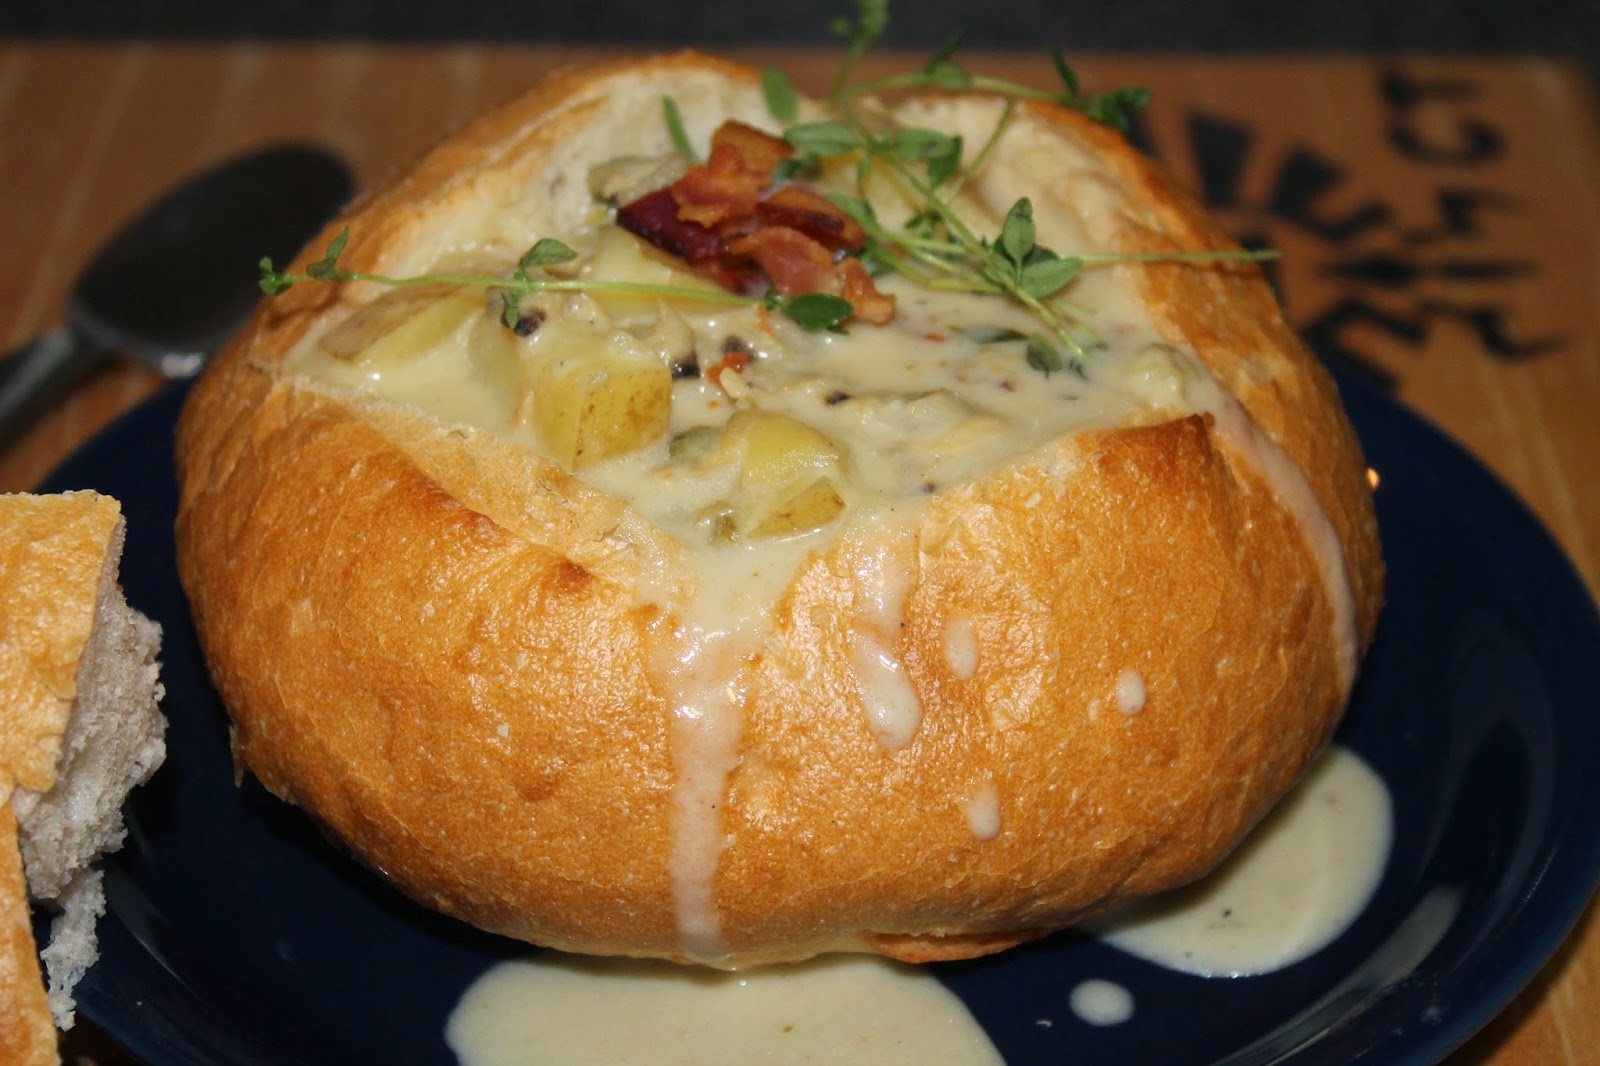

(Oh, and this shouldn't be an issue, but we did find a wee piece of clam shell in with the meat, which was very unpleasant to bit down upon, I am sure. Just be careful, kids.)

Until next time, go forth and eat well!

Tuesday, September 16, 2014

Scallops with mashed potatoes and asparagus

Hello again, dear readers!

Today, I just wanted to share a tasty dish I made for dinner last week: scallops. Nothing fancy, nothing crazy, not even a F.E.A.S.T., just a simple meal that you yourself can make without too much effort.

"Ye gods!" you say. "But wherein lies the adventure?" you ask. An excellent question, indeed! And I have an answer for you!

::cue crickets chirping::

Ok, so there really isn't one. I've made scallops before, and they're easy. I mean, super easy. But I haven't had the chance to prepare them in ages, so I wanted to try my hand again. I looked up several methods and then adapted my favorites into a cohesive whole. And I am pleased to say that they turned out marvelously. And that's why I decided to tell you about them: because they're easy enough to cook that with a little effort you too can plate a mighty impressive dish that will have others saying, "ooh" and "ahh."

Don't believe me? Come now, have I ever led you astray? And no, don't even talk about my last experiment with ice cream; that was for science!

WHAT I USED!!!
1lb. frozen bay scallops, thawed, drained, and patted dry
3 slices bacon, chopped
2/3 cup apple juice or cider
1 half-pint heavy cream
approx 2lbs golden potatoes
1 stick butter, softened
1 bunch of asparagus
garlic, minced, to taste
salt and pepper
fresh chives, chopped

WHAT I DID!!!
Drop the potatoes in a pot and add enough water to cover by an inch. Give it a good pinch of salt and then set it over high heat. Once it boils, drop the heat to med-low and let them simmer for about 20-30 minutes or until the taters can be easily pierced by a knife without much resistance. Drain the spuds once they're done.

Meanwhile, prepare your asparagus. Hold the stalks one at a time by the base and near the middle, and start bending them gently. The hard, undesirable part of the stalk should snap cleanly off. Bring a pot of water to a boil. Once this is ready, drop the asparagus in and give it a minute to blanch. This will improve both the color and the flavor. After a minute, transfer the veggies using a slotted spoon into a waiting bowl of ice water to halt the cooking process. Once they've cooled, set them aside to dry.

Cook the bacon in a large nonstick skillet over medium heat until browned. Using your trusty slotted spoon once more, transfer the bacon to a waiting pile of paper towels to drain. Up the heat to high and add the scallops to the bacon drippings! to cook. Give 'em a few shakes and cook until they all just turn opaque, or about four minutes. Grab that ever-so-useful slotted spoon once more and remove the scallops to a dish, and stash said dish in a warm oven to keep things toasty.

Add the apple juice/cider and 1/3 cup of the cream to the pan. Cook this mixture to boiling over med-high heat until the sauce thickens, or about seven minutes, stirring occasionally. You'll know it's ready when the sauce coats the back of a metal spoon and holds its shape when you swipe your finger through it. This is called nappe', as I've mentioned before. Add salt and pepper to taste.

While the sauce does its magic, cook your asparagus. Get a nonstick skillet warmed up over medium to med-high heat and give it a swirl of olive oil. Add as much or little garlic as you care to and saute until the garlic just begins to gain some color. Add your asparagus and give it a toss to coat the veggies in olive oil and garlic. Cook the asparagus until it softens slightly and begins to pick up some color of its own.

Warm the remaining cream for a few seconds in the microwave. Then simply go to town with your favorite potatoes masher or a hand mixer if you so choose. Once the potatoes have been mashed, work in the butter and cream and blend it all into one amalgamous mixture.

To serve, place a good pile of potatoes on each plate. Top with a scoop of delicious scallops, then place a few stalks of asparagus off to one side slightly. Give the whole thing a bit of sauce, and sprinkle with bacon and chives. That's it, you're done!


Ok, so maybe it looks a little complex once I write it all out, but it's really not all that bad. Trust me, this may seem like a handful of steps, but they're all pretty basic steps if you really stop and break it all down: prep and make mashed potatoes, saute some asparagus, saute scallops, make a basic sauce, combine. That's it! Trust me, it's easy.

And totally worth it too. The scallops have a natural sweetness to them, and they lack any of that "fishy" smell that turns off so many people. Moreover, the potatoes are rich (but not too rich), and the asparagus provides a nice counterpoint both in texture and in flavor.

If I were to offer any critique of the meal, it's that the scallops can get lost in the potatoes. This is simple because they are so small. You don't lose the flavor much, it just gets mixed in with the rest of the dish. To be honest, I would have preferred to use the larger, meatier sea scallops, which are three times as big. The problem was they were also three times the price, so I had to pass. Maybe next time though.

Anyway, I hope you enjoyed this post. And I hope you'll go out there and give this method a try. It'll impress and amaze your friends, I guarantee!

Comments and suggestions are welcome as always. Until next time, go forth and eat well!

Thursday, July 3, 2014

Jalapeno Popper Mac & Cheese Stuffed Peppers

Hello once again, loyal readers!

So. This title. It's a doozy, isn't it? Well, before your question my sanity, let me explain.

In the past few months, I've really started to develop a love for spicy foods. Not super over-the-top why-God-why? spicy, but the the kind of spicy that just gives you a good kick as you eat it. As such, I've also come to love jalapeno poppers.

For those not in the know, a jalapeno popper is simply a hollowed out jalapeno stuffed with cream cheese. Often times the filling will contain chicken. Often times the entire thing will be wrapped in delicious, delicious bacon. Sometimes they're even deep-fried.

Yeah. They're tasty.

So I thought to myself: how could I add to that awesomeness? Well, I thought, they already have cheese inside, so what could go well with that? Simple: pasta! And spicy mac & cheese totally happens all the time down in the Caribbean, so there's all the precedent I needed.

But, the idea of trying to cram noodles into jalapenos (which are not exactly large) seemed questionable. So then I thought, what if I deconstructed the popper, mixed it into the macaroni, and then stuffed all of that into a different pepper? Hence this idea was born! Behold!!

WHAT I USED!!!
6 bell peppers, caps removed (and saved), inner cores and seeds removed
6 jalapenos, seeds similarly removed, and julienned (that's cut into strips)
4 boneless skinless chicken breasts, cubed
1 medium yellow onion, diced
1 package bacon, cooked and diced
4 tbs butter
4 tbs flour
1-2 cups milk
2 blocks cream cheese, cubed
2 cups (8oz) elbow macaroni
shredded cheddar cheese for topping the peppers

WHAT I DID!!!
First, cook your chicken. I did what I always do: a little olive oil, some salt and pepper, medium to medium high heat in my favorite skillet, cooked until all the pink is gone. It only takes a few minutes. Oh, and be sure to drain the chicken well when it cooks.

Next, melt the butter in a saucepan over medium heat. Add the onion and jalapenos and saute until the veggies soften. Sprinkle the flour over the veggies and cook for two to three minutes to form a roux. Add enough milk to create a sauce. (I admit, I didn't measure this, but it was somewhere between one cup and two.) Once you have a base sauce, incorporate the two cream cheese blocks one at a time. Once it's all completely melted and formed into a cheesy saucy consistency, stir in the bacon and the chicken.

Meanwhile, boil your pasta to al dente, following the packages instructions. Once the noodles are done, drain them thoroughly and add them to the cheesy-bacony-chicken sauce.

Now, scoop the mixture into the hollowed-out peppers. You're going to have left over filling most likely. Arrange the peppers in an oven-safe dish so they will sit upright. Sprinkle the mixture with your shredded cheese, and replace the caps. Bake at 350 degrees for 25 to 30 minutes or until the peppers have softened. Serve with the sides of your choice.


These came out quite well, I am very pleased to say. The mac & cheese filling had the perfect balance of heat from the jalapenos, savory saltiness from the meats, and sweet cheesiness from, well, the cheese. It tasted just like a jalapeno popper spliced with warm comforting mac & cheese, which was, after all, the entire point.

If I were to offer any criticism of the meal, it would be that the bell peppers seemed almost extraneous. The filling was definitely the star, which is good. But since the original idea was to add mac & cheese to a jalapeno popper, the bell peppers didn't seem to contribute much. Not that they weren't tasty, mind. They just didn't really add much to the dish.

I think next time I may go with my original idea of stuffing the mac & cheese inside the jalapeno. I may even deep-fry the suckers just for the hell of it! Maybe it'll work, maybe it won't, but I'm willing to try it and see!

As always, thanks for reading. Comments, suggestions, thoughts, and especially new ideas are always welcome. Until next time, go forth and eat well!

Friday, September 20, 2013

Beer and Bacon Pancakes

Y'know what I've always thought was a great idea? Breakfast for dinner. I tend to make it on a fairly regular basis, but I don't always experiment. Well, that's changing.

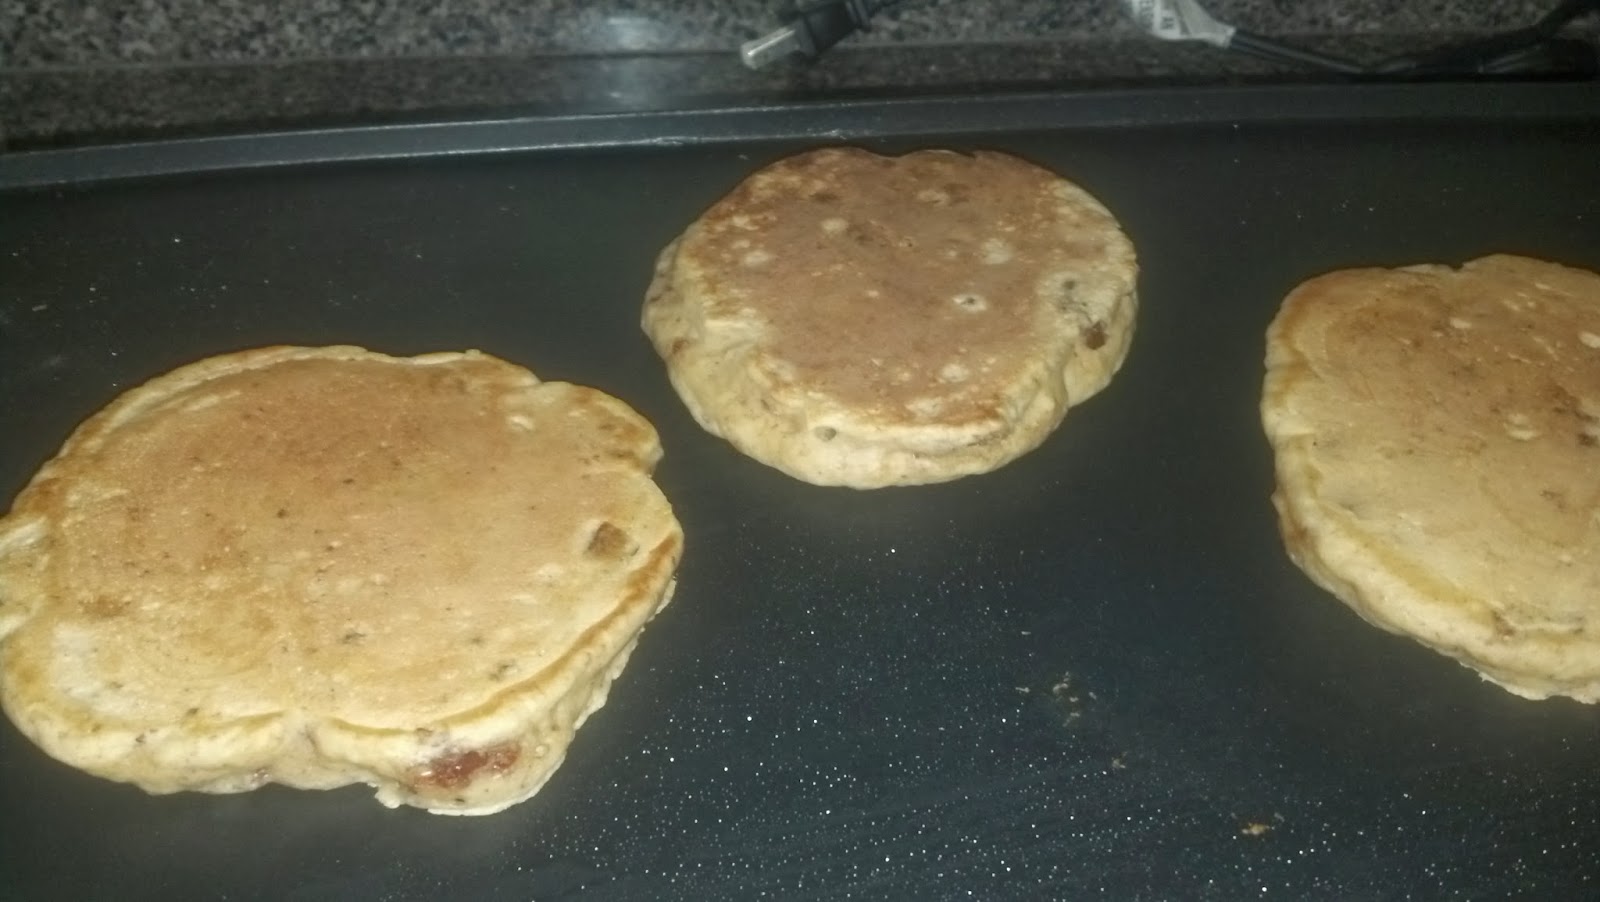
So. Pancakes. Made with beer. And bacon. Crazy huh? My roommate suggested the idea of pancakes made with beer, and a quick Google search led me here of all places. Rather than following this method exactly, I decided to simply use it as a guide and improvise a little. I adapted a basic pancake recipe to my needs, and these are the results:


Not bad, huh? Truth to tell though, the results weren't quite what I hoped they would be. Don't get me wrong, they were tasty enough, but I think the idea needs some tweaking. For one thing, the "beer" flavor overwhelmed the others, so we lost the delicious savory bacon taste except in small bursts. And although I used a seasonal beer (Shock Top pumpkin wheat), a lot of the warm autumn flavors fell to the background too.

Next time, I think I'll use a lighter flavored beer, like maybe a blond or a hefeweizen. The other option, if I want to stick with the pumpkin ale, would be to add more spices, such as cinnamon, nutmeg and clove. I love the praline bacon (yes, you heard me), and I think it works well in the recipe. But next time I plan to use think-cut bacon instead of the thin stuff; I think it'll hold up better in the batter.

Well, I suppose I should actually get to the method now, shouldn't I? As always, if anyone has an suggestions or comments, I'm always glad to hear them.

THE INGREDIENTS!!!
2 cups AP flour
5 tsp baking powder
2 eggs, lightly beaten
1 12oz beer (something of quality, please)
1 12oz package bacon
2.5 oz brown sugar
1.5 oz pecans

THE METHOD!!!
 The first step is to make Praline Bacon. It's pretty easy to do, actually. First, heat your oven to 400 degrees. Grab a cookie sheet with a lip and line it with a big piece of aluminum foil. Set a cooling rack on top and lay out the bacon in a nice neat row. Bake until almost, but not quite, done. The thin stuff took less than 10 minutes, but the AB method calls for a full 30 on the thick-cut strips.

While the bacon bakes, drop the pecans and brown sugar into a food processor and chop to a fine bread crumb consistency. When the bacon is almost done, pull it out. Working carefully, sprinkle the bacon with the brown sugar/pecan mixture and gently pat down to set it.


Place the bacon back into the oven for another 10 minutes or until done. And make sure to watch it; I didn't keep a close enough eye on it and ended up burning it a little.

Oh, don't look at me like that. I know it's a culinary sin and I'll go to confession later.

Anyway. When the bacon is (properly) done, let it cool for a few minutes before removing from the rack and chopping into bite-sized pieces. Again, work carefully so as not to burn yourself.

Meanwhile, combine the flour and baking powder in a large mixing bowl. Add the eggs, beer, and bacon, and stir to combine.

Heat your electric griddle to medium, about 300 to 325. Drop the batter in 1/4 cup increments onto the hot griddle, and cook for 2-3 minutes per side, or until done. Serve with (real!) maple syrup.


See, it's a pretty straightforward method. It just needs some fine-tuning.

Anyway, as always, thanks for reading!