Ok, so the acronym may need some work, I admit.
It stands for Quick and Easy, Cheap and Tasty. That's the point of this recipe. I wanted to show that good food can be made on the cheap in a relatively short amount of time for a relatively small amount of money. So let's just jump right to it, shall we?
THE INGREDIENTS!! (and prices)
3 boneless chicken breasts, cubed (from a $6.99 3lb frozen bag)
1 16oz bag of egg noodles ($1.29)
1 package crimini mushrooms, chopped ($1.49)
1 cup frozen peas (from a $0.99 bag)
2 cups (handfuls) baby spinach, chopped (from a $2.99 bag)
2 cans condensed cream of mushroom and/or chicken soup ($0.79 x2)
I bought everything at Aldi and Wal-mart, because I know I can get it all for fairly cheap. Final price? $15.33, assuming you have to buy all of it, and half of that is the meat. Keep in mind: this leaves you with plenty of frozen chicken, some frozen peas, and a good amount of spinach left over to use in other dishes.
THE METHOD!!
Season the chicken breasts with salt and pepper. Saute over medium-high heat in a little vegetable oil (I normally use olive oil, but I was out) until done all the way through.
Once the chicken is done, wipe out the skillet and repeat with the mushrooms. Saute until the 'shrooms are browned all over. Work in two batches; it actually helps the mushrooms to cook faster if you don't crowd the pan.
Warm up the peas as per package instructions, probably in the microwave. For me, it was a cup of peas with two tablespoons water, covered, for six minutes.
Meanwhile, bring a large pot of water to boil and cook the egg noodles to al dente, again as per package instructions. If you don't care for egg noodles, any sort of pasta will do: bowties, penne, you name it.
After you drain the pasta, toss it all back in the pot and add one of the soups. Use a splash of hot water (I just save some boil water) to help thin the soup slightly.
Put the chicken and mushrooms back in your skillet, add the peas and spinach, then add the other soup. Again, a little hot water helps to see everything evenly coated. Mix it all together, and season with more salt and pepper to taste. I also added some crushed red pepper and Italian seasoning, because I happen to be a fan of both.
When this is done, add the meat/veggie mixture to the noodles. Stir thoroughly to combine, serve and enjoy. Add a bit more pepper or another sprinkle of Italian seasoning if you like. I put a little Frank's RedHot Sauce on mine, because apparently you really can put that sh!t on almost everything.
Ok, so let's go over our acronym checklist then.
Quick: from start to finish, the whole thing took me 40 unhurried minutes. And I mean start to finish. From the time I started to pull my thawed chicken breast out of the fridge to the time I sat down to eat was a mere 40 minutes. Not as fast as a sandwich, I admit, but still pretty quick for a hot filling meal.
Easy: well, I'd say it's pretty straightforward. Nothing complicated or fancy. Boiling pasta and chopping some veggies is all fairly easy I'd say. Cooking the chicken shouldn't provide any major difficulties either, unless I miss my guess. Again, not as easy as a sandwich, but we're still talking about a hot meal here.
Cheap: if you don't count the chicken, the whole meal costs around $7 to make. For me, frozen chicken is a staple, so I'm not inclined to include it in the price of the meal, since I almost always have it on hand anyway.
Tasty: yes, quite. Just try making it, see what you think. I bet you'll decide you like it too. The tastes are pretty simple, but that means it's open to all kinds of customization: different veggies, different meat, and different soup flavors are all very real possibilities here. Next time, if I want to up the budget a smidgen, I may throw in some shredded cheese for a little extra indulgence!
In the end, I think this is a very successful first attempt at a Q.E.C.T. (yeah, I really need to work on that acronym...) meal. It's not anything fancy, but then, fancy wasn't the point in the first place. The point was to be able to cook a good, hot meal when you come home from a long day at work without having to worry that it'll take forever or else break your bank. And in that, I believe I have done well.
Anyway, as always, thanks for reading, and I look forward to hearing from everyone!
A blog dedicated to my adventures in food and cooking.
Monday, July 22, 2013
Thursday, July 18, 2013
Sushi
Hi everyone!
For my (other) roommate's birthday last week, I made sushi for dinner. Now, this is not something I've ever tried to do before, mind you. But he said he wanted to give me a little challenge, and he made the request, so I said OK.
I wasn't about to try making any kind of sushi that requires raw fish. Don't get me wrong, I'm not scared of raw fish, but unfortunately I don't have a reliable source for quality seafood. As such, I decided my best option was to make California Rolls. They're relatively simple, and they don't require raw fish, so the chance of something going terribly, terribly, "why God, why?!" wrong is immensely decreased.
For those interested, I used the AB method for Cali Rolls, since it's pretty straightforward and easy to follow.
First, I made the sushi rice. You do this by rinsing 2 cups of short-grain (sushi) rice until the water runs clear. You then combine the rice with 2 cups clean water in a pot over high heat and bring it to a boil. Once that happens, cook the rice, covered, over the lowest heat for 15 minutes and then off the heat entirely for 10. The rice is then deposited in a large glass (or wooden) bowl.
Meanwhile, you combine 2tbsp rice vinegar with 2tbsp sugar and 1 of salt. This goes into the microwave for 30 seconds to dissolve everything. Now, I found that this wasn't enough liquid, so I added another tablespoon of vinegar, which still wasn't really enough to dissolve all that sugar and salt. Maybe I shouldn't have used kosher salt this time, since the flakes are so big. Next time, I think I may just buy some sushi rice seasoning and use that instead. Regardless, this gets sprinkled onto the rice and is cut/folded into said grains with a big wooden spoon. You don't stir, per se, because that can turn the rice into a gummy pile of mush.
If possible, you're supposed to use a paper fan (or similar apparatus) to cool the rice as you go. This is not as easy as it looks. After a few minutes, the awkwardness kinda gets to you. Granted, I only had a paper notebook to use as a fan so maybe I'm biased. But the point is that once the rice is cooled to room temp it's ready to be used.
The most challenging part of the process, in my opinion, is the assembly. I had everything I needed ready to go. OK, so, that's not completely true. I did not have a bamboo rolling mat ready to go. Because I don't own one, that's why. I thought, "Hey, I'll just use some foil or some parchment; how difficult can it be?" I should know by now that these kinds of thoughts never bode well for me.
Rolling the sushi was a challenge. I reckon it mainly requires more practice than I've had, which until that night was none. I did find it was easier to roll with the nori (the seaweed sheet) on the outside, rather than trying to have the rice on the outside as is the norm for Cali Rolls. Maybe my rice wasn't sticky enough, but I had the damnedest time just trying to get the rolls to seal themselves.
Fortunately, the sushi was quite good and, even better, they actually tasted like Cali Rolls! All things considered, I believe they were a success. I can't wait to try again! It's actually quite fun to make, and I'm hoping to one day be able to try the raw fish. It's a bit risky, true, but it just means I need to be extra careful.
Regardless, I love sushi, and now that I've made it once, I won't be so apprehensive about giving it another go. I've learned that I can't let my nervousness get in the way when I try to cook something new. Yes, there's always the chance something can go wrong; that's always the case when you try something new and different. But, if you let that worry get in your way, how will you ever know if you can do it, right? Now, am I going to get past this bump overnight? Probably not. But the more I do, even if I make mistakes, the better I become and the more I feel confident about trying to make new things. So yes, I would say I met this challenge, and I'm looking forward to the next one.
Anyway, tell me what you think. As always, thanks for reading!
For my (other) roommate's birthday last week, I made sushi for dinner. Now, this is not something I've ever tried to do before, mind you. But he said he wanted to give me a little challenge, and he made the request, so I said OK.
I wasn't about to try making any kind of sushi that requires raw fish. Don't get me wrong, I'm not scared of raw fish, but unfortunately I don't have a reliable source for quality seafood. As such, I decided my best option was to make California Rolls. They're relatively simple, and they don't require raw fish, so the chance of something going terribly, terribly, "why God, why?!" wrong is immensely decreased.
For those interested, I used the AB method for Cali Rolls, since it's pretty straightforward and easy to follow.
First, I made the sushi rice. You do this by rinsing 2 cups of short-grain (sushi) rice until the water runs clear. You then combine the rice with 2 cups clean water in a pot over high heat and bring it to a boil. Once that happens, cook the rice, covered, over the lowest heat for 15 minutes and then off the heat entirely for 10. The rice is then deposited in a large glass (or wooden) bowl.
Meanwhile, you combine 2tbsp rice vinegar with 2tbsp sugar and 1 of salt. This goes into the microwave for 30 seconds to dissolve everything. Now, I found that this wasn't enough liquid, so I added another tablespoon of vinegar, which still wasn't really enough to dissolve all that sugar and salt. Maybe I shouldn't have used kosher salt this time, since the flakes are so big. Next time, I think I may just buy some sushi rice seasoning and use that instead. Regardless, this gets sprinkled onto the rice and is cut/folded into said grains with a big wooden spoon. You don't stir, per se, because that can turn the rice into a gummy pile of mush.
If possible, you're supposed to use a paper fan (or similar apparatus) to cool the rice as you go. This is not as easy as it looks. After a few minutes, the awkwardness kinda gets to you. Granted, I only had a paper notebook to use as a fan so maybe I'm biased. But the point is that once the rice is cooled to room temp it's ready to be used.
![]() |
| Ingredients: cucumber, krab, avocado, nori, and rice |
The most challenging part of the process, in my opinion, is the assembly. I had everything I needed ready to go. OK, so, that's not completely true. I did not have a bamboo rolling mat ready to go. Because I don't own one, that's why. I thought, "Hey, I'll just use some foil or some parchment; how difficult can it be?" I should know by now that these kinds of thoughts never bode well for me.
![]() |
| Cali Rolls: first (or second?) attempt |
![]() |
| Inverted Cali Rolls (with cream cheese added like in Philly Rolls. Yum!) |
Regardless, I love sushi, and now that I've made it once, I won't be so apprehensive about giving it another go. I've learned that I can't let my nervousness get in the way when I try to cook something new. Yes, there's always the chance something can go wrong; that's always the case when you try something new and different. But, if you let that worry get in your way, how will you ever know if you can do it, right? Now, am I going to get past this bump overnight? Probably not. But the more I do, even if I make mistakes, the better I become and the more I feel confident about trying to make new things. So yes, I would say I met this challenge, and I'm looking forward to the next one.
Anyway, tell me what you think. As always, thanks for reading!
Monday, July 8, 2013
Spinach and Sun-Dried Tomato Ice Cream
Yeah, you read that right.
I made ice cream with spinach and sun-dried tomatoes. And I served it over a bed of macaroni.
Why? Because I could. And because I thought it'd be a fun, crazy idea. And I'm going to tell you all how I made it.
I basically adapted a simple and straightforward ice cream recipe:
THE INGREDIENTS!!
1 cup whole milk
2 cups heavy cream
3/4 cup sugar
pinch of salt
10oz frozen spinach, thawed and squeezed dry
sun-dried tomatoes, finely chopped, to taste
THE METHOD!!
All you do is mix the milk, cream, sugar, and salt together with an electric mixer on low speed. Once the sugar and salt are dissolved, stir in the spinach. Refrigerate over night.
The next day, make the ice cream as per the machine's instructions. At the end, stir in the chopped tomatoes. It's a good idea to have the final resting place ready and chilled so the ice cream won't melt during transport.
When it's time to eat, cook up some pasta (I had macaroni, so that's what I used) and cook to al dente. Drain the pasta, but reserve some of the water. Toss the noodles with some salt, and use a little of the reserved water (a few tablespoons) to help it stick if you like.
Let the noodles cool from piping hot to warm, then serve with a scoop or two of your ice cream.
In the end though, I'm sad to say that my crazy idea was not a huge success. My victims, er- I mean: tasters and I all agreed that the ice cream was tasty and had a good foundation. However, it was simply too rich and too sweet to have as a main course. I tried for a hot/cold salty/sweet dish, and I achieved that goal, true. But I also had an overabundance of spinach and not enough of the tomatoes for the flavors to balance correctly.
But! I will not consider the dish a failure. It may not have turned out quite how I wanted it, but it was a fun experiment. Now that I know the ice cream itself will work, I need to go back and tinker. A little research may yield a better base recipe with which to work. Further, I may skip the pasta next time and just have this be some kind of appetizer dish, assuming I can get the balance right. It just means I'll need to try again!
Well, thanks for joining me on this quick post. If you have any thoughts regarding the dish or the condition of my sanity I look forward to hearing them! Until next time everyone!
I made ice cream with spinach and sun-dried tomatoes. And I served it over a bed of macaroni.
Why? Because I could. And because I thought it'd be a fun, crazy idea. And I'm going to tell you all how I made it.
I basically adapted a simple and straightforward ice cream recipe:
THE INGREDIENTS!!
1 cup whole milk
2 cups heavy cream
3/4 cup sugar
pinch of salt
10oz frozen spinach, thawed and squeezed dry
sun-dried tomatoes, finely chopped, to taste
THE METHOD!!
All you do is mix the milk, cream, sugar, and salt together with an electric mixer on low speed. Once the sugar and salt are dissolved, stir in the spinach. Refrigerate over night.
The next day, make the ice cream as per the machine's instructions. At the end, stir in the chopped tomatoes. It's a good idea to have the final resting place ready and chilled so the ice cream won't melt during transport.
When it's time to eat, cook up some pasta (I had macaroni, so that's what I used) and cook to al dente. Drain the pasta, but reserve some of the water. Toss the noodles with some salt, and use a little of the reserved water (a few tablespoons) to help it stick if you like.
Let the noodles cool from piping hot to warm, then serve with a scoop or two of your ice cream.
In the end though, I'm sad to say that my crazy idea was not a huge success. My victims, er- I mean: tasters and I all agreed that the ice cream was tasty and had a good foundation. However, it was simply too rich and too sweet to have as a main course. I tried for a hot/cold salty/sweet dish, and I achieved that goal, true. But I also had an overabundance of spinach and not enough of the tomatoes for the flavors to balance correctly.
But! I will not consider the dish a failure. It may not have turned out quite how I wanted it, but it was a fun experiment. Now that I know the ice cream itself will work, I need to go back and tinker. A little research may yield a better base recipe with which to work. Further, I may skip the pasta next time and just have this be some kind of appetizer dish, assuming I can get the balance right. It just means I'll need to try again!
Well, thanks for joining me on this quick post. If you have any thoughts regarding the dish or the condition of my sanity I look forward to hearing them! Until next time everyone!
Friday, July 5, 2013
Twice-baked Chicken Parmesan Potatoes
So, a couple of days ago I decided to try something a little different. Originally I had thought to make twice-baked potatoes for dinner one night, and a chicken Parmesan-like meal for another. But then, I had a brainstorm: why not make both on the same night? That is when this idea was born.
Now, it still needs some work. I plan to tinker with it, but for now I'm going to post the recipe as I designed and executed it. Overall, I'm pretty pleased with it.
THE INGREDIENTS!!
8 potatoes (these were small to medium sized), scrubbed and allowed to dry
1 pkg bacon (maple smoked if you want to know)
4 chicken breasts
5 tomatoes, cored, seeded, quartered (no, not a lot, I know)
balasamic vinegar
chopped garlic
16oz block of mozzarella cheese
8oz block cream cheese, softened (I found one made with Greek yogurt and wanted to try it)
green onions
1 cup panko (coarse Japanese breadcrumbs in case you're unfamiliar)
3 tbs butter, melted
grated Parmesan cheese, to taste
THE METHOD!!
To begin, I baked the bacon. Its easy: put the bacon on a cooling wrack over a foil-lined baking sheet (one with a good lip all the way around). Put the apparatus in a cold oven and set for 400 degrees. Wait about 20 minutes, or until the bacon reaches the desired crispiness. You could fry it if you prefer, but I like this method.
Cut the chicken into bite sized pieces and season with salt and pepper. Cook over medium to medium-high heat until they're done all the way through.
Toss the tomato quarters with a splash of balsamic vinegar, a few teaspoons of chopped garlic, and a pinch of salt. Lay them out on a baking sheet (I always line mine with parchment or foil) cut side up. Meanwhile, rub a little oil on the potatoes, pierce them a few times with a fork, and lay them out in a 9x13 inch baking dish.
When the bacon comes out of the oven, up the temp to 450, and put the tomatoes and the potatoes in. The tomatoes need 20-30 minutes, while the potatoes need more like 45 to an hour. You're looking for the tomatoes to be soft and sizzling and for the potatoes to be fork tender.
Once that's all baking, you can assemble everything else. Slice enough mozzarella to have one piece for each potato half (in my case, I sliced 8 pieces off the block and cut each in half) and grate the remainder. Chop the bacon into small pieces. Ditto that with the green onions. I also chopped the chicken into smaller pieces for convenience. Run the tomatoes through a food processor or blender until liquified.
![]() |
| Cooking can be a bit messy... and blurry, apparently. |
When the potatoes are done, pull them out of the oven. Without burning yourself, cut each one in half and scoop the insides into a large bowl. Be sure to save the skins. Mix in the cream cheese until it's all incorporated. Then add the chicken, mozzarella, bacon, green onions, and tomato sauce. Stir to combine. Fill each empty skin with a genrous serving of the potato mixture and return to the 9x13.
Combine the panko with the melted butter. Put a slice of mozzarella cheese on top of each potato, and sprinkle with the panko. Throw some grated Parmesan cheese on for good measure.
Put the whole thing back in the oven for 10 minutes, or until the panko browns and the mozza is nice and bubbly. Cool for a few minutes, then serve immediately. Top with sour cream if you desire.
THE RESULTS!!
Overall, I like the idea. But, while it was indeed quite good, I felt that the whole "chicken Parmesan" thing I was going for got a bit lost in the execution. For one thing, the green onions provided too strong of a flavor. For another, I did not have nearly enough tomato sauce.
On the plus side though, the bacon and chicken worked well together and with everything else. The cream cheese and mozzarella came together nicely, providing a uniform texture throughout the dish. Plus, I really liked the nice crunch from the panko.
I think next time I'm going to try to change things up in one of two ways. The first option is to use larger potatoes (I didn't like the small ones; not enough meat) and more sauce. I might lose the green onion entirely. The goal would be to have the flavor focus on the chicken and the tomato sauce. So, maybe use a little less bacon as well, since it has such a strong presence.
For the second option, imagine that I left the chicken and tomato sauce out of the mix. Maybe ditch the green onion again. Then, after filling the skins, lay a few pieces of chicken on top of the potato mixture. Top that with the sauce and a slice of mozzarella, essentially making a mini chicken Parmesan on top of each twice baked potato. Or, should the chicken stay in the mix with just the sauce on top? Hmmm... I guess call that option 2.5 or something.
If anybody has any suggestions about which method would be better, please let me know!
Well, I hope this all sounded interesting to everyone, because I really enjoyed making it. I'm hoping to try it again sometime in the future, and when I do, I'll be sure to let you all see the results!
Thursday, June 20, 2013
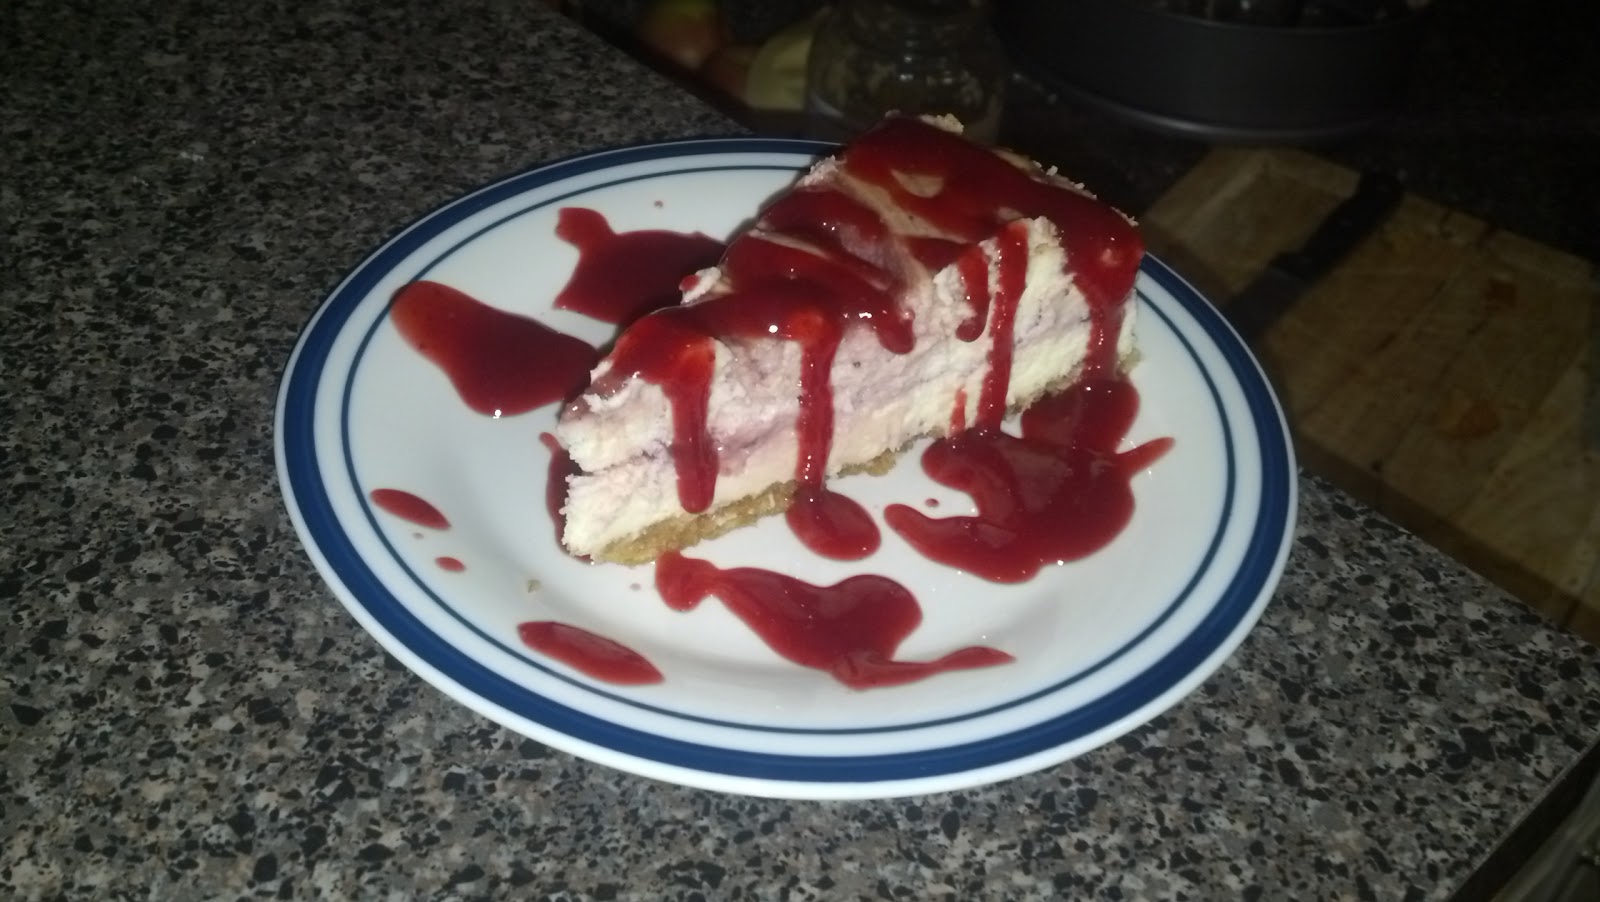
Strawberry Swirl Cheesecake
One of my roommates just had a birthday, and I, looking for any excuse to make a dessert, asked him to pick something for me to make. His choice was a cheesecake. More specifically he asked for a strawberry swirl cheesecake, as opposed to a plain cheesecake with a strawberry topping.
Cheesecake and I don't always get along. Don't get me wrong, I love cheesecake. And sure, I can make 'em fine, but often times something goes amiss. But, the man made a request and I endeavored to fulfill it. So I went searching through the internets, and found a recipe that I liked. I liked it because it seemed fairly simple. I wasn't about to get cocky, however, because often times the simplest things to make are the simplest to get wrong. This would not be a cheesecake afflicted by hubris.
I gathered my ingredients together, which was easy enough. Cream cheese, strawberries. graham crackers, etc. I did depart from the recipe slightly in the crust. Nothing big, mind you. But I like my graham cracker crust to have some... character, I guess you'd call it. Rather than use pre-ground crumbs, I take whole crackers and crumble them up by hand in a plastic bag. It makes for a more rustic texture, and I really like it. (OK, I admit, it's also and AB thing)
Other than that, I followed along with the given method, and I didn't have any hiccups. I thought for sure the strawberry sauce wasn't going to work. After all, it's just frozen strawberries and a little cornstarch liquified in a blender and applied with heat. But it turned out well as a sauce, and it swirled into the cheesecake rather nicely.
I'm also happy to say that the waterbath worked correctly for once. I figured out the trick to it: you have to use large sized heavy-duty foil. Anything else will just tear. Yes, I know, it seems obvious doesn't it? But sometimes you learn that the things you miss are often the things that make the most sense. The point is: now I know, and I won't have a repeat of past mishaps. (Trust me, hot water plus graham cracker crust in a leaky springform pan is not fun.)
All said and done, it turned out pretty well, and was quite tasty, so I'll give you a few money-shots to ogle for a while:
Also, it has been pointed out to me that while I have plenty of cooking, I am lacking in shenanigans. Now, I don't want to do crazy just for its own sake (at least not all the time), but I do want to experiment more. So, If anybody has any suggestions on something I can try, let me know. Even if it's, "hey, what would happen if you (insert action here) with that mac and cheese recipe?" It can even be something simple with the challenge of making it more interesting.
Anyway, if you have any thoughts, please post them in the comments section. Thanks everyone!
Cheesecake and I don't always get along. Don't get me wrong, I love cheesecake. And sure, I can make 'em fine, but often times something goes amiss. But, the man made a request and I endeavored to fulfill it. So I went searching through the internets, and found a recipe that I liked. I liked it because it seemed fairly simple. I wasn't about to get cocky, however, because often times the simplest things to make are the simplest to get wrong. This would not be a cheesecake afflicted by hubris.
I gathered my ingredients together, which was easy enough. Cream cheese, strawberries. graham crackers, etc. I did depart from the recipe slightly in the crust. Nothing big, mind you. But I like my graham cracker crust to have some... character, I guess you'd call it. Rather than use pre-ground crumbs, I take whole crackers and crumble them up by hand in a plastic bag. It makes for a more rustic texture, and I really like it. (OK, I admit, it's also and AB thing)
Other than that, I followed along with the given method, and I didn't have any hiccups. I thought for sure the strawberry sauce wasn't going to work. After all, it's just frozen strawberries and a little cornstarch liquified in a blender and applied with heat. But it turned out well as a sauce, and it swirled into the cheesecake rather nicely.
I'm also happy to say that the waterbath worked correctly for once. I figured out the trick to it: you have to use large sized heavy-duty foil. Anything else will just tear. Yes, I know, it seems obvious doesn't it? But sometimes you learn that the things you miss are often the things that make the most sense. The point is: now I know, and I won't have a repeat of past mishaps. (Trust me, hot water plus graham cracker crust in a leaky springform pan is not fun.)
All said and done, it turned out pretty well, and was quite tasty, so I'll give you a few money-shots to ogle for a while:
Also, it has been pointed out to me that while I have plenty of cooking, I am lacking in shenanigans. Now, I don't want to do crazy just for its own sake (at least not all the time), but I do want to experiment more. So, If anybody has any suggestions on something I can try, let me know. Even if it's, "hey, what would happen if you (insert action here) with that mac and cheese recipe?" It can even be something simple with the challenge of making it more interesting.
Anyway, if you have any thoughts, please post them in the comments section. Thanks everyone!
Tuesday, June 18, 2013
Lasagna
Hey everyone,
Didn't get a chance to post anything last week, so I felt I'd make up for it with two posts for this one. So to start, I'm going to talk about the lasagna that I made over the weekend. It's my adaptation of a family recipe, so this time I'm going to lay out the whole process from start to finish, and y'all can tell me what you think.
THE INGREDIENTS!
tomato sauce (see recipe below)
1 lb lasagna noodles
1 16oz tub of ricotta cheese
2 cups shredded mozzarella cheese, divided (1 cup + 1 cup)
1 package mozzarella (in natural ball form), sliced
Parmesan cheese, freshly grated, to taste/cover
10oz frozen spinach, thawed, drained, squeezed (need to ditch as much water as you can)
1 egg
2 lbs ground meat, browned (I used mild Italian sausage, but beef works too)
This is actually pretty straightforward. Warm up the sauce in a pot or saucepan, then stir in the cooked meat. Meanwhile, combine the ricotta, the spinach, 1 cup of mozza, the egg and the Parmesan (1/2 to 1 cup approx) together in a separate bowl. Boil the pasta according to the box's instructions, then drain.
In the bottom of a 9x13 baking pan, spread a little of the sauce, then add your first layer of pasta, Follow this with a layer of the cheese mixture, then more noodles. Next comes a proper layer of the sauce, and throw some of that sliced mozzarella cheese on as well. Repeat the pattern until you're done, but try to end with sauce on top. Spread the remaining shredded mozza on top, along with more Parm. Bake in a 350 degree oven for an hour, or until the cheese is bubbly and slightly browned.
For the sauce:
1 yellow onion, chopped
a few cloves of garlic, finely chopped (a few spoonfuls of the pre-chopped stuff works fine)
a good splash of olive oil (maybe a quarter cup)
1 28oz can crushed tomatoes
1 small can tomato paste (8oz I think)
white wine
balsamic vinegar to taste
Worcestershire sauce to taste
Italian seasoning blend to taste
In a medium bot or sauce pan, saute the onion and garlic in olive oil with a pinch of salt until the onion takes on a golden color. Add a good splash of wine to deglaze the pan (you're trying to get all the brown bits off the bottom to mix back in) then add the tomatoes in their crushed and paste forms.
Stir to combine, then add a splash of wine, balsamic vinegar, and Worcestershire sauce to taste, along with some black pepper and a generous pinch of Italian seasoning. Honestly, you just add the bits in until it tastes like how you want it too. No, really, it's just a matter of experimentation!
So have fun!
Didn't get a chance to post anything last week, so I felt I'd make up for it with two posts for this one. So to start, I'm going to talk about the lasagna that I made over the weekend. It's my adaptation of a family recipe, so this time I'm going to lay out the whole process from start to finish, and y'all can tell me what you think.
THE INGREDIENTS!
tomato sauce (see recipe below)
1 lb lasagna noodles
1 16oz tub of ricotta cheese
2 cups shredded mozzarella cheese, divided (1 cup + 1 cup)
1 package mozzarella (in natural ball form), sliced
Parmesan cheese, freshly grated, to taste/cover
10oz frozen spinach, thawed, drained, squeezed (need to ditch as much water as you can)
1 egg
2 lbs ground meat, browned (I used mild Italian sausage, but beef works too)
This is actually pretty straightforward. Warm up the sauce in a pot or saucepan, then stir in the cooked meat. Meanwhile, combine the ricotta, the spinach, 1 cup of mozza, the egg and the Parmesan (1/2 to 1 cup approx) together in a separate bowl. Boil the pasta according to the box's instructions, then drain.In the bottom of a 9x13 baking pan, spread a little of the sauce, then add your first layer of pasta, Follow this with a layer of the cheese mixture, then more noodles. Next comes a proper layer of the sauce, and throw some of that sliced mozzarella cheese on as well. Repeat the pattern until you're done, but try to end with sauce on top. Spread the remaining shredded mozza on top, along with more Parm. Bake in a 350 degree oven for an hour, or until the cheese is bubbly and slightly browned.
For the sauce:
1 yellow onion, chopped
a few cloves of garlic, finely chopped (a few spoonfuls of the pre-chopped stuff works fine)
a good splash of olive oil (maybe a quarter cup)
1 28oz can crushed tomatoes
1 small can tomato paste (8oz I think)
white wine
balsamic vinegar to taste
Worcestershire sauce to taste
Italian seasoning blend to taste
In a medium bot or sauce pan, saute the onion and garlic in olive oil with a pinch of salt until the onion takes on a golden color. Add a good splash of wine to deglaze the pan (you're trying to get all the brown bits off the bottom to mix back in) then add the tomatoes in their crushed and paste forms.Stir to combine, then add a splash of wine, balsamic vinegar, and Worcestershire sauce to taste, along with some black pepper and a generous pinch of Italian seasoning. Honestly, you just add the bits in until it tastes like how you want it too. No, really, it's just a matter of experimentation!
So have fun!
Friday, June 7, 2013
Stir Fry
I've been working on a stir fry technique for some time now, and I'm sad to say it still needs some work. Oh, it's tasty enough, but there's always something... missing. I made it last night for dinner and, though it was good, it still seemed to be lacking something. Maybe someone out there reading this can suggest an idea or three?
My basic ingredients:
- 1 block extra firm tofu
- two bags frozen stirfry veggie mix
- sauce (this time I used a teriyaki sauce, though I've made a peanut sauce from scratch before)
- a pot of rice
Simple, right? Well, that was the idea: simple and delicious. And cheap. And healthy. Seriously, you can get away with this meal for under $10 easy. And, if you skip the rice or use brown instead of white, it's actually pretty good for you on top of everything else.
So first the tofu. Yes, tofu. Come on, it's not that bad. And it's pure protein, so just go with me, OK? If the tofu comes in a liquid, the first thing you do is prep the tofu by wringing it out. This is accomplished through the cunnning use of cutting boards and weight:
Slice the tofu into two or four pieces of equal size. Wrap the tofu in paper towels and set it between two cutting boards. Place something of moderate weight (you don't want to squish the curd, after all) to provide pressure. After 15-20 minutes, all the excess moisture will be gone.
Once that's done, you can marinate the tofu as shown below. I used a premade teriyaki sauce this time, but soy sauce with some spices works equally well. The best thing to do is to marinate the tofu overnight; that gives it plenty of time to absorb the flavors (I did mine for about an hour, and I've decided that is not enough time by any stretch). Turn it over now and then if it isn't completely submerged so you get full coverage.
When it comes time to cook, I like to use an electric griddle over medium heat, but you can chop it up in a wok or a skillet just as easily. The trick is to treat it like meat. No, really, it works, so don't look at me like that. Cook it until it's Golden, Brown & Delicious on all sides, and you're done.
Once that's ready, the rest is pretty straightforward. I thaw my veggies a bit and throw them in a hot wok with a little oil and heat them though. Sometimes I drain the melted water that tends to accumulate near the bottom. Once it's all hot, I chop the tofu and toss it in. Then I add my sauce, which in this case was teriyaki, as I've said. Then I serve it over rice:
Looks good, yes? I did have a couple of issues though: for starters, I'm not sure I like this teriyaki sauce I've been using. It's not the cheap stuff, so it tastes pretty good, but it's still fairly... liquidy. As such, nothing can coat the veggies the way I'd really prefer. When I make my peanut sauce, I start with peanut butter, so that's not really an issue. Maybe I should try making a teriyaki sauce from scratch....
Second, the tofu turned out bland. And don't say, "Well, it is tofu after all." Had I marinated the curd overnight like I'm supposed to do, it would have absorbed much more flavor and been far from bland. Trust me; I have witnesses.
On the plus side, I think I've gotten my rice technique down (no more burnt crunchy bits!). For anyone who's interested to know:
Put one cup rice in a pot, add 2 1/4 cups liquid (I did 2 cups water, 1/4 cup low sodium soy sauce). Add any spices (ginger, ground red pepper, garlic, etc.) you prefer and a tablespoon of butter. Heat over medium high until boiling, stirring occasionally, then drop the heat to low. Simmer, covered, for about 15 minutes or until all the liquid is gone. Now and then, give it a quick stir and then reapply the lid to conserve heat. I find that this works for me, but part of my success may relate to how I watch the rice cook.
From here, I guess I just need to keep practicing. Next time, I'm going to make my own sauce, either teriyaki or peanut, and use that. I'll also marinate the tofu overnight to achieve maximum flavor infusion. So I will pose a question: does anybody have any suggestions? I'd really like it if part of this blog was about sharing ideas and knowledge. I want to document my own experiences as a means to improve my cooking skills, but if I could help others achieve the same, I'd feel pretty good about that.
So! Thoughts, ideas, experiences! Let's have at 'em!
My basic ingredients:
- 1 block extra firm tofu
- two bags frozen stirfry veggie mix
- sauce (this time I used a teriyaki sauce, though I've made a peanut sauce from scratch before)
- a pot of rice
Simple, right? Well, that was the idea: simple and delicious. And cheap. And healthy. Seriously, you can get away with this meal for under $10 easy. And, if you skip the rice or use brown instead of white, it's actually pretty good for you on top of everything else.
So first the tofu. Yes, tofu. Come on, it's not that bad. And it's pure protein, so just go with me, OK? If the tofu comes in a liquid, the first thing you do is prep the tofu by wringing it out. This is accomplished through the cunnning use of cutting boards and weight:
Slice the tofu into two or four pieces of equal size. Wrap the tofu in paper towels and set it between two cutting boards. Place something of moderate weight (you don't want to squish the curd, after all) to provide pressure. After 15-20 minutes, all the excess moisture will be gone.
Once that's done, you can marinate the tofu as shown below. I used a premade teriyaki sauce this time, but soy sauce with some spices works equally well. The best thing to do is to marinate the tofu overnight; that gives it plenty of time to absorb the flavors (I did mine for about an hour, and I've decided that is not enough time by any stretch). Turn it over now and then if it isn't completely submerged so you get full coverage.
When it comes time to cook, I like to use an electric griddle over medium heat, but you can chop it up in a wok or a skillet just as easily. The trick is to treat it like meat. No, really, it works, so don't look at me like that. Cook it until it's Golden, Brown & Delicious on all sides, and you're done.
Once that's ready, the rest is pretty straightforward. I thaw my veggies a bit and throw them in a hot wok with a little oil and heat them though. Sometimes I drain the melted water that tends to accumulate near the bottom. Once it's all hot, I chop the tofu and toss it in. Then I add my sauce, which in this case was teriyaki, as I've said. Then I serve it over rice:
![]() |
| Eaten with chop-sabers from ThinkGeek; 'cause why not? |
Looks good, yes? I did have a couple of issues though: for starters, I'm not sure I like this teriyaki sauce I've been using. It's not the cheap stuff, so it tastes pretty good, but it's still fairly... liquidy. As such, nothing can coat the veggies the way I'd really prefer. When I make my peanut sauce, I start with peanut butter, so that's not really an issue. Maybe I should try making a teriyaki sauce from scratch....
Second, the tofu turned out bland. And don't say, "Well, it is tofu after all." Had I marinated the curd overnight like I'm supposed to do, it would have absorbed much more flavor and been far from bland. Trust me; I have witnesses.
On the plus side, I think I've gotten my rice technique down (no more burnt crunchy bits!). For anyone who's interested to know:
Put one cup rice in a pot, add 2 1/4 cups liquid (I did 2 cups water, 1/4 cup low sodium soy sauce). Add any spices (ginger, ground red pepper, garlic, etc.) you prefer and a tablespoon of butter. Heat over medium high until boiling, stirring occasionally, then drop the heat to low. Simmer, covered, for about 15 minutes or until all the liquid is gone. Now and then, give it a quick stir and then reapply the lid to conserve heat. I find that this works for me, but part of my success may relate to how I watch the rice cook.
From here, I guess I just need to keep practicing. Next time, I'm going to make my own sauce, either teriyaki or peanut, and use that. I'll also marinate the tofu overnight to achieve maximum flavor infusion. So I will pose a question: does anybody have any suggestions? I'd really like it if part of this blog was about sharing ideas and knowledge. I want to document my own experiences as a means to improve my cooking skills, but if I could help others achieve the same, I'd feel pretty good about that.
So! Thoughts, ideas, experiences! Let's have at 'em!
Subscribe to:
Posts (Atom)